
A whiteboard animation can show an idea.
A narrator can explain why that idea matters.
Combining the two creates one of the most useful formats for explainers, education, training, product demonstrations and business presentations.
An AI whiteboard video generator with voice can help turn a topic into visual scenes, progressively reveal text and illustrations, generate narration for each part of the explanation and assemble everything into a finished video.
Instead of manually switching between script software, drawing tools, text-to-speech services and video editors, a structured workflow can look like:
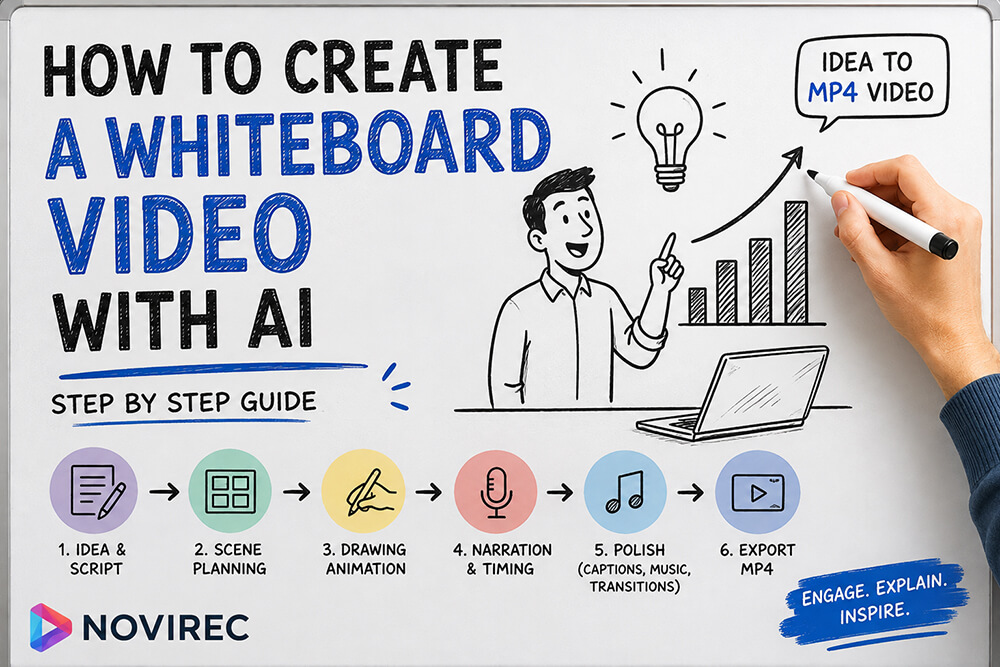
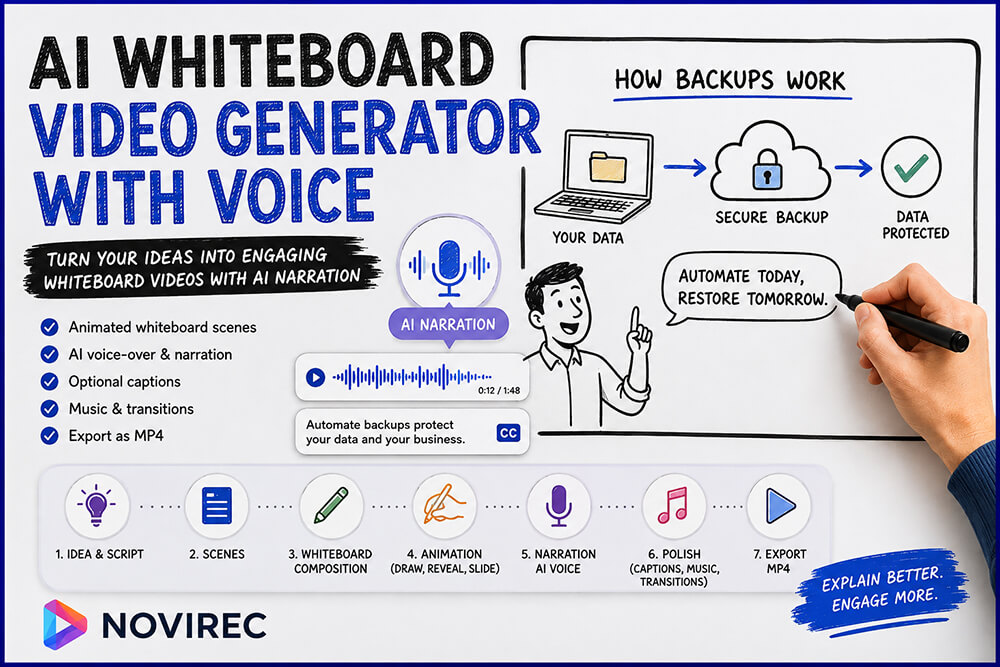
Idea → Script → Whiteboard Scenes → Drawing Animation → Voice → Timing → Polish → MP4
That is the approach behind Novirec’s current Whiteboard workflow.
Open Novirec Studio to start building a narrated Whiteboard Video.
What Is an AI Whiteboard Video Generator with Voice?
An AI whiteboard video generator with voice combines two different forms of communication.
The whiteboard
Shows:
- keywords;
- diagrams;
- characters;
- arrows;
- illustrations;
- examples;
- visual relationships.
The narrator
Explains:
- context;
- meaning;
- transitions;
- examples;
- details;
- conclusions.
The most effective videos do not make both layers say exactly the same thing.
For example:
Board
3 Ways to Reduce Energy Costs
Narrator
“Most businesses focus on changing suppliers first, but the largest savings often come from understanding where the energy is being used.”
The board gives the viewer a visual anchor.
The voice provides the explanation.
That is much more effective than placing an entire paragraph on screen.
Why Add Voice to a Whiteboard Video?
Whiteboard animation is already useful without narration.
But voice significantly increases what the format can communicate.
Consider a scene showing:
Customer → Website → Checkout → Payment
The diagram is understandable.
But narration can add:
“At every step in this journey, a customer can abandon the purchase. Even a small improvement in one stage can increase the final conversion rate.”
The picture shows the process.
The narrator explains the implication.
Voice is particularly useful for:
- training;
- education;
- product explanations;
- complex processes;
- onboarding;
- marketing;
- presentations;
- storytelling;
- tutorials.
It also allows the board itself to remain much cleaner.
Whiteboard Text, Narration and Captions Are Different
This distinction is important.
A narrated whiteboard project can contain three different kinds of text.
| Layer | Purpose |
|---|---|
| Board text | Main concepts and visual anchors |
| Narration | Spoken explanation |
| Captions | Written representation of spoken audio |
They should not be treated as the same thing.
Imagine the narrator says:
“The average visitor decides within seconds whether the page feels relevant to their problem.”
The board might display only:
Relevance in seconds
You do not need the full spoken sentence permanently written on the canvas.
And if subtitles are enabled, they can temporarily display the narration independently.
This separation keeps the board cleaner and easier to understand.
Do You Need Captions If Your Whiteboard Already Has Voice?
Not always.
Voice and subtitles should remain independent choices.
You might want:
Narration ON
Captions OFF
for a presentation where the board already contains significant text.
Or:
Narration ON
Captions ON
for social content where many viewers may watch without sound.
The right choice depends on where the video will be viewed.
Captions are especially useful for
- social platforms;
- silent autoplay;
- accessibility;
- technical vocabulary;
- international audiences.
Captions may be unnecessary when
- the board already contains plenty of text;
- the video is primarily presented with sound;
- subtitles would cover important drawings;
- a cleaner visual style is preferred.
There is no reason to force captions simply because narration exists.
How a Narrated AI Whiteboard Workflow Works
A complete workflow can be divided into nine stages.
| Stage | What happens |
|---|---|
| 1. Idea | Define topic and audience |
| 2. Script plan | Structure what needs to be explained |
| 3. Scenes | Divide the explanation |
| 4. Board | Add text and visuals |
| 5. Animation | Draw, reveal or slide elements |
| 6. Narration | Prepare the spoken explanation |
| 7. Voice | Generate and preview the narrator |
| 8. Polish | Captions, music and transitions |
| 9. Export | Produce the final MP4 |
The important principle is that voice is part of the story structure, not something added randomly at the end.
Step 1 — Define What the Narrator Needs to Explain
Before writing narration, decide what the video is trying to communicate.
Suppose your topic is:
Why businesses need cybersecurity backups.
The goal is not:
Make a whiteboard video about backups.
A better brief is:
Explain to small-business owners why a backup is important, what should be backed up and how a simple backup strategy reduces risk.
Now the narrator has a job.
The video should answer:
- What is the risk?
- What information needs protection?
- What is a backup?
- Where should copies be stored?
- What should the viewer do next?
That structure will naturally become the scene plan.
Step 2 — Create One Main Message Per Scene
Narration becomes much easier when every scene has one purpose.
For example:
Scene 1
Purpose
Show the risk of losing data.
Scene 2
Purpose
Explain what information needs protection.
Scene 3
Purpose
Explain what a backup actually is.
Scene 4
Purpose
Show why one copy is not enough.
Scene 5
Purpose
Explain automation.
Scene 6
Purpose
Give the viewer a final action.
Now each narration paragraph has a clear responsibility.
This prevents the voice-over from becoming a long, unfocused monologue.
Step 3 — Compose the Whiteboard Before Finalizing the Voice
It is often useful to know what the viewer will see before finalizing what the narrator will say.
Suppose Scene 3 already contains:
- laptop;
- folder icon;
- arrow;
- cloud;
- label “Backup Copy”.
You no longer need narration such as:
“A laptop sends a copy of the folder to the cloud.”
The audience can see that.
Instead:
“The important part is that the second copy remains available even if the original device fails.”
The voice adds value instead of describing the obvious.
Step 4 — Keep Board Text Short
Narrated whiteboard videos work best when the voice carries the detail.
Instead of writing this on the board:
Automated backups reduce the risk of losing important business data because they do not depend on somebody remembering to manually copy files every day.
Use:
Automate your backups
Then let the narrator explain:
“Automatic backups reduce human error because protection no longer depends on someone remembering to copy the files every day.”
The viewer only needs to read four words.
That leaves more attention available for the voice and animation.
Step 5 — Choose How Each Visual Should Appear
A narrated whiteboard video does not need one animation effect for everything.
Different elements can use different reveal methods.
Write On
Useful for:
- titles;
- labels;
- keywords;
- numbers.
Full Draw
Useful for clean drawable vector assets such as:
- arrows;
- symbols;
- diagrams;
- basic icons.
Simulated Draw
Useful for:
- people;
- objects;
- rich illustrations;
- complex artwork.
Hand Reveal
Useful when the visual cannot be literally redrawn but should still appear progressively.
Slide In
Useful for:
- examples;
- images;
- cards;
- supporting text;
- visual variation.
The narrator should follow that reveal sequence.
Step 6 — Write Narration That Adds Meaning
This is the central skill.
Ask:
What does the viewer still need to understand after looking at this board?
That becomes the narration.
Example
Board:
Problem → Solution → Result
Narrator:
“A strong explainer does not begin with the product. It begins with the problem the audience already recognizes, then shows how the solution changes the situation.”
The board gives the structure.
The narrator gives the reasoning.
A Simple Narration Formula
For many explainer scenes, you can use:
Context → Explanation → Takeaway
For example:
Context
“Most small businesses keep important documents on only one or two computers.”
Explanation
“If those devices are damaged, stolen or encrypted by malware, the original files may no longer be accessible.”
Takeaway
“A separate backup creates a recovery path.”
That produces a complete explanation without making the board overly complicated.
Step 7 — Use AI to Draft the Narration
AI can help generate the first narration draft from:
- the overall topic;
- scene purpose;
- visible board text;
- important concepts.
This is especially useful when you already know what the scene should explain but do not want to write every sentence manually.
The useful workflow is:
Draft with AI
↓
Read
↓
Edit
↓
Generate voice
The AI draft should be treated as a starting point.
Check whether it:
- sounds natural;
- fits the audience;
- explains the correct concept;
- avoids unnecessary repetition;
- transitions logically;
- fits the expected scene length.
Step 8 — Keep Narration Conversational
Whiteboard narration is heard, not read.
Long written sentences can sound unnatural when spoken.
Compare:
Written style
“Organizations implementing automated and geographically distributed backup methodologies may significantly mitigate operational disruption resulting from unforeseen data-loss events.”
Spoken style
“Automatic backups stored in more than one place can make recovery much easier when something goes wrong.”
Both communicate a similar idea.
The second is much easier to understand in a video.
Use:
- shorter sentences;
- familiar vocabulary;
- natural transitions;
- deliberate pauses.
Read every narration aloud before approving it.
Step 9 — Generate the AI Voice Only When the Text Is Ready
Avoid generating a new voice recording after every tiny text change.
A more efficient workflow is:
- Draft narration.
- Edit the wording.
- Read it.
- Confirm the scene.
- Generate the voice.
- Preview.
- Approve.
This reduces unnecessary regeneration and keeps the creative process easier to follow.
Step 10 — Preview the Voice with the Whiteboard Animation
The voice should never be judged in isolation.
A sentence can sound excellent by itself but feel wrong when placed against the animation.
Watch both together.
Check whether:
- the hand reveals the right element at the right moment;
- the viewer can read the text before the narrator moves on;
- the narration finishes naturally;
- the scene does not feel rushed;
- there is no long unexplained silence.
The viewer experiences one combined timeline.
That is what you need to judge.
Step 11 — Approve Narration Scene by Scene
For a multi-scene explainer, review each section before moving forward.
Ask:
Does the scene explain one useful thing?
If not, simplify it.
Does the voice match the board?
If not, change one of them.
Does the narration repeat visible text?
Remove duplication.
Does it naturally lead to the next scene?
Add a transition where necessary.
This scene-by-scene approval process makes a long whiteboard video much easier to manage.
Step 12 — Allow Some Scenes to Stay Silent
Not every scene requires narration.
A short visual moment can sometimes communicate perfectly on its own.
For example:
Scene:
A graph progressively rises.
Text:
+42%
A brief musical pause may be more effective than immediately explaining it.
Silent scenes are useful for:
- reveals;
- transitions;
- emotional pauses;
- numbers;
- visual conclusions.
Do not fill every second simply because a narrator is available.
Step 13 — Match the Animation to the Narrator
Imagine this narration:
“The first step is awareness. The second is consideration. And the third is conversion.”
The board contains three stages.
A strong animation would reveal them sequentially.
Narrator:
“The first step is awareness.”
Awareness appears.
“The second is consideration.”
Consideration appears.
“And the third is conversion.”
Conversion appears.
The visual timing reinforces the spoken structure.
If all three stages appeared immediately, the animation would lose some of its explanatory value.
Step 14 — Avoid Drawing Too Slowly Under Fast Narration
A common pacing problem occurs when:
- the narrator finishes quickly;
- the drawing takes a long time.
The viewer then watches several seconds of drawing after the explanation has already moved on.
The opposite problem is equally awkward:
- drawing finishes immediately;
- narration continues for another fifteen seconds.
The scene should give both layers enough room.
That may mean:
- shortening the narration;
- speeding up a reveal;
- simplifying the visual;
- extending the scene;
- splitting one scene into two.
Step 15 — Give the Viewer Time After the Voice Finishes
A useful explainer often benefits from a short visual hold.
The narrator finishes:
“That is why a separate backup is essential.”
The completed board remains visible briefly.
Then the next scene begins.
That moment lets the viewer process:
- diagram;
- labels;
- final point.
Do not rush away from the completed explanation.
Step 16 — Use One Consistent Narrator
For most explainer videos, one narrator is enough.
A consistent voice gives the project:
- continuity;
- recognizable tone;
- professional cohesion.
The same voice can guide viewers through every scene even when the visual content changes dramatically.
This is especially useful for:
- training series;
- educational channels;
- branded explainers;
- course content.
You do not need multiple character voices simply because multiple illustrated people appear on the board.
Choosing the Right AI Voice for a Whiteboard Video
The ideal narrator depends on the audience.
Education
Look for:
- clear pronunciation;
- moderate speed;
- warm tone.
Business
Look for:
- confidence;
- clarity;
- professional pacing.
Children’s education
Look for:
- energy;
- friendliness;
- expressive delivery.
Technical training
Look for:
- calm pace;
- precision;
- strong intelligibility.
Marketing
Look for:
- slightly faster pace;
- engaging tone;
- concise delivery.
The “best” voice is not necessarily the most dramatic one.
It is the one that helps the audience understand the content.
Narration Speed Matters
A fast narrator can make a simple board feel stressful.
A slow narrator can make a short explainer feel unnecessarily long.
The right speed depends on:
- difficulty of the topic;
- amount of visible information;
- audience;
- scene density.
Technical or educational material often benefits from slightly more space.
Simple marketing content can usually move faster.
Always judge speed with the animation playing.
Do Not Use Voice to Fix a Confusing Board
Suppose a diagram contains:
- seven arrows;
- five boxes;
- four colors;
- multiple labels;
- unclear hierarchy.
Adding more narration will not necessarily make it understandable.
Simplify the board.
The narrator should enhance the explanation.
It should not function as a repair mechanism for poor visual communication.
When Should the Narrator Speak Before the Drawing?
Sometimes voice should lead the visual.
Narrator:
“There are three main reasons.”
Then the first visual appears.
This creates anticipation.
When Should the Drawing Appear Before the Voice?
Sometimes the visual should lead.
A warning icon appears.
Short pause.
Narrator:
“This is where most teams make their first mistake.”
That can create emphasis.
There is no universal rule.
Use timing intentionally.
Add Captions After the Voice Works
If captions are needed, add them after the narration itself is approved.
The correct order is generally:
Narration text
↓
Voice
↓
Timing
↓
Captions
Captions are derived from the spoken content.
They should not dictate the narration.
Keep Whiteboard Captions Visually Simple
The board already contains information.
Avoid enormous subtitle blocks.
Prefer:
- short phrases;
- high contrast;
- stable placement;
- enough distance from key drawings.
Captions should support accessibility without becoming another dominant visual element.
Add Background Music After Voice and Timing
Music belongs later in the process.
First make sure:
- the narration works;
- the timing works;
- the explanation is understandable.
Then add music.
This prevents a soundtrack from influencing decisions that should be based on communication.
For many whiteboard videos, subtle music works better than dramatic music.
Lower Music During Narration
When voice is active, the narrator should remain easy to understand.
One useful technique is audio ducking:
Music automatically becomes quieter while the narrator is speaking.
Then it can rise during:
- pauses;
- transitions;
- silent visual moments.
This creates a much more polished mix.
Add Transitions Between Sections
A narrated video can use scene transitions to help signal changes in subject.
For example:
Cut
Good for:
- rapid educational content;
- numbered steps;
- short social videos.
Fade
Good for:
- changing sections;
- slower explainers.
Crossfade
Good when:
- one concept naturally flows into another.
Avoid overly elaborate transitions.
The narrator and whiteboard should remain the focus.
Example: AI Whiteboard Video with Voice
Imagine the topic:
How compound interest works.
Scene 1 — The basic idea
Board
$1,000 + time icon.
Narration
“Compound interest means you can earn returns not only on your original money, but also on the returns already added to it.”
Scene 2 — Year one
Board
$1,000 → $1,050
Narration
“If one thousand dollars grows by five percent, you finish the year with one thousand and fifty.”
Scene 3 — Year two
Board
$1,050 → $1,102.50
Narration
“The next five percent is calculated on the new amount, not the original thousand.”
Scene 4 — Compounding
Board
Small curve becomes steeper.
Narration
“Over longer periods, that difference becomes increasingly important.”
Scene 5 — Takeaway
Board
Time matters
Narration
“The key ingredient is not only the return. It is the amount of time that return has to compound.”
The board remains simple.
The voice delivers the actual lesson.
AI Whiteboard with Voice vs Silent Whiteboard
| Silent Whiteboard | Whiteboard with Voice |
|---|---|
| Viewer reads more | Viewer can listen |
| More text often needed | Board can stay concise |
| Works well for loops | Better for explanations |
| Good for displays | Strong for education/training |
| Timing mainly visual | Voice and visual timing matter |
| Simpler production | Richer communication |
Neither is universally better.
A silent whiteboard can be perfect for a short social loop.
A narrated version is usually more useful when the viewer needs to understand a concept.
AI Whiteboard with Voice vs Talking-Head Video
A talking-head video centers the presenter.
A whiteboard video centers the idea.
This can be useful when you do not want to:
- appear on camera;
- record a studio presentation;
- manage lighting;
- film multiple takes.
The visual explanation itself becomes the presenter.
Voice keeps the human storytelling element without requiring a talking head.
AI Whiteboard with Voice vs Standard AI Video
Generative AI video is useful when you need:
- cinematic scenes;
- realistic environments;
- movement;
- storytelling imagery.
Whiteboard works particularly well when you need:
- explanation;
- diagrams;
- sequential concepts;
- education;
- structured information.
If the goal is:
“Show a futuristic city.”
Use generative video.
If the goal is:
“Explain how a smart city manages electricity.”
Whiteboard may be the clearer format.
Can You Use AI-Generated Images in a Narrated Whiteboard?
Yes.
Not every Whiteboard visual has to be a simple icon.
You can use:
- AI-generated characters;
- illustrations;
- product images;
- diagrams;
- photos;
- SVG graphics.
The important part is choosing an animation method appropriate to the asset.
Complex artwork can use progressive reveal techniques instead of being forced into a literal line drawing.
Prepare Images Before Adding Them to the Board
A cleaner source asset usually integrates better.
For example, if you have an image with a large background you do not need, removing it can make the visual easier to combine with:
- text;
- arrows;
- diagrams;
- other assets.
You can use Novirec’s public Remove Background tool to create a transparent version.
If you need an editable vector version of a raster image, Vectorize Image can convert supported images into SVG.
What Makes a Good Narrated Whiteboard Video?
A strong project generally has:
Clear structure
Every scene answers one question.
Short board text
The screen does not become an article.
Useful narration
Voice adds information.
Progressive visuals
The viewer sees information appear in meaningful order.
Natural pacing
Voice and animation feel connected.
Consistent narrator
The project has one recognizable voice.
Controlled music
The soundtrack never competes with speech.
Clean ending
The viewer understands what they should remember or do next.
Common AI Whiteboard Voice Mistakes
Reading the board word for word
Use narration to add context.
Writing narration like an essay
Write for speech.
Generating voice too early
Finish the text first.
Using narration in every second
Silence can be useful.
Making the board too busy
Voice should allow the visuals to stay simpler.
Adding captions automatically
Enable them only when they improve the experience.
Letting music compete with speech
Voice always takes priority.
Using inconsistent narrator styles
Keep one clear identity.
Ignoring scene timing
The animation must fit the spoken explanation.
Never watching the complete sequence
Pacing problems often appear only when scenes are combined.
Frequently Asked Questions
What is an AI whiteboard video generator with voice?
It is a tool or workflow that combines whiteboard-style animation with AI-assisted narration or text-to-speech, allowing the viewer to watch concepts appear while listening to an explanation.
Can AI write the whiteboard narration?
Yes. AI can help draft narration based on the topic, scene plan and visible content. The text should still be reviewed before voice generation.
Can I create a whiteboard video without recording my own voice?
Yes. Text-to-speech can generate the narrator from written scene narration.
Do I need captions if my whiteboard video already has narration?
No. Captions are optional and serve a different purpose. They can improve accessibility and silent viewing but do not need to be enabled for every narrated video.
Can some whiteboard scenes have no voice?
Yes. Silent scenes can be useful for visual reveals, pauses and transitions.
Can I add music to a narrated whiteboard video?
Yes. Keep the soundtrack subtle and reduce its volume while the narrator is speaking.
Can I export the finished whiteboard animation as a video?
Yes. A completed Novirec Whiteboard project can move through narration, polishing and final video export as an MP4.
Create an AI Whiteboard Video with Voice
A good narrated whiteboard video is not simply:
AI voice + moving drawings.
The two layers should work together.
The board tells the viewer:
where to look.
The animation tells them:
what to notice now.
The narrator tells them:
what it means.
And the scene structure determines:
what they should understand next.
Start with the idea.
Break it into clear scenes.
Keep the board concise.
Let AI help draft the narration.
Generate the voice only when the wording is ready.
Preview the animation and narration together.
Add captions only when they help.
Use music and transitions to polish the experience.
Then export the complete sequence.
That turns whiteboard animation into a complete narrated explainer, rather than a collection of animated drawings.
Open Novirec Studio and create your first narrated Whiteboard Video.
Need an account first? Create your Novirec account.
Want to compare plans before starting? View Novirec Pricing.
Ready to put this workflow into practice?
Open Novirec Studio and start creating with the same tools covered in this guide.