
Whiteboard videos are effective because they turn information into a sequence the viewer can watch being explained.
Instead of placing every idea on screen at once, the video gradually reveals:
- words;
- diagrams;
- illustrations;
- arrows;
- symbols;
- key concepts.
Traditional whiteboard animation can require a script, storyboard, illustrator, animation software, voice-over recording and final video editing.
AI can now simplify much of that process.
A modern workflow can look like:
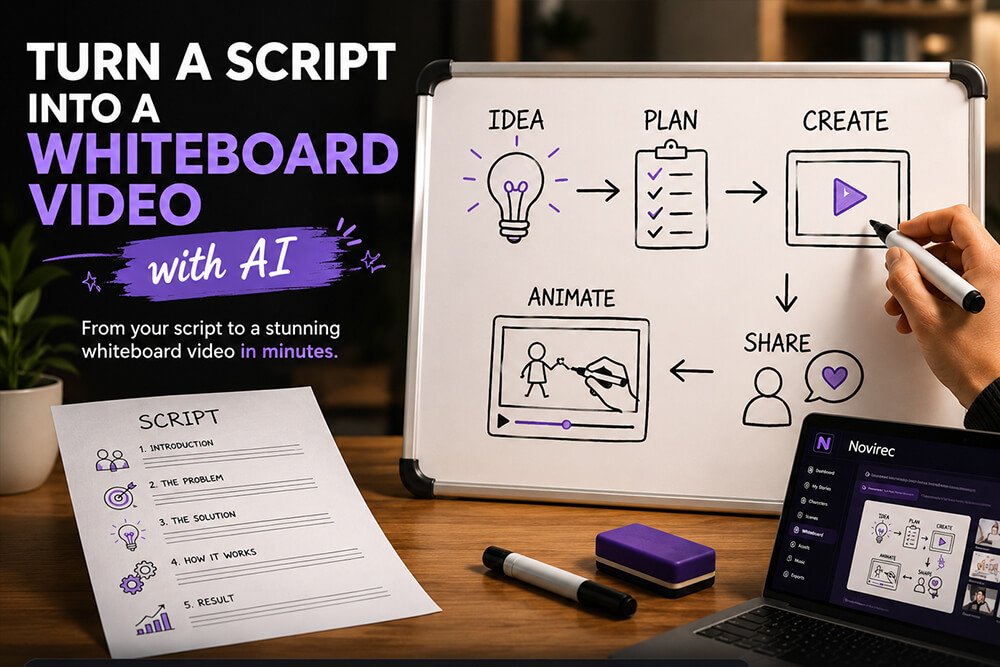
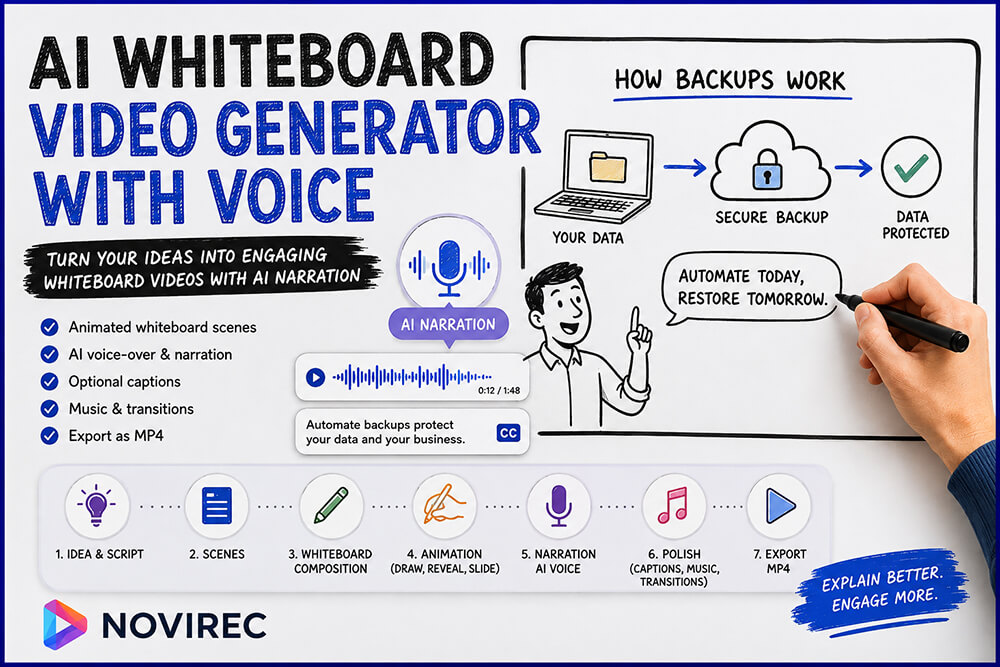
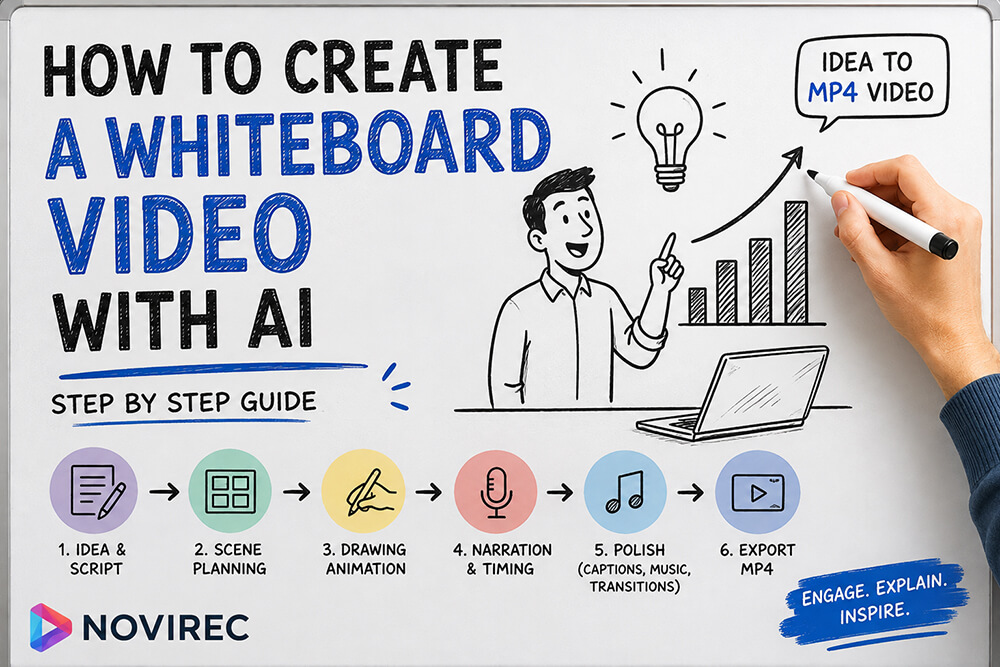
Idea → Script → Whiteboard Scenes → Drawing Animation → Narration → Polish → MP4
The important part is not simply adding a hand animation to random images.
A useful whiteboard video needs to decide what to explain, what the viewer should see, when each element should appear and what the narrator should say.
This guide walks through that process from beginning to end.
You can follow the same overall workflow inside Novirec Studio.
What Is an AI Whiteboard Video?
An AI whiteboard video is an explainer-style video where text, drawings, diagrams or visual elements appear progressively while a concept is being explained.
The AI can assist with different stages:
- organizing the topic;
- creating a script;
- planning scenes;
- writing concise visual copy;
- preparing narration;
- generating or selecting visuals;
- producing voice-over;
- helping coordinate timing.
The animation itself can then reveal content using techniques such as:
Write On
Text appears as if it is being written.
Full Draw
Compatible vector elements are progressively drawn along their real paths.
Simulated Draw
Complex illustrations are revealed progressively while preserving their original visual appearance.
Hand Reveal
An image appears progressively under a moving hand.
Slide In
The hand pushes an element into the scene.
Not every asset needs to use the same animation.
The best whiteboard videos mix techniques according to what the viewer needs to understand.
The Complete AI Whiteboard Workflow
A practical production sequence looks like this:
| Stage | Main goal | Result |
|---|---|---|
| Idea | Define the subject and audience | Clear brief |
| Script plan | Structure the explanation | Ordered concepts |
| Scenes | Divide the script visually | Whiteboard sequence |
| Composition | Add text and visuals | Complete boards |
| Animation | Reveal elements progressively | Whiteboard motion |
| Narration | Explain the ideas aloud | Voice-over |
| Timing | Synchronize visuals and voice | Natural pacing |
| Polish | Add captions, music and transitions | Finished presentation |
| Export | Assemble the final sequence | MP4 video |
Each stage solves a different problem.
Trying to do everything at once usually makes the project harder.
Step 1 — Start with the Viewer, Not the Animation
Before thinking about hands, arrows or drawing effects, answer three questions:
Who is watching?
What should they understand?
What should they remember after the video ends?
Imagine you want to make a whiteboard video explaining:
How solar panels generate electricity.
A weak objective would be:
Make a cool whiteboard animation about solar panels.
A much better objective is:
Explain to homeowners with no technical background how sunlight becomes usable electricity in under two minutes.
Now you have:
Audience: homeowners
Knowledge level: beginner
Goal: understand the process
Constraint: concise explanation
That information should guide everything that follows.
Step 2 — Turn the Topic into a Simple Script Plan
A whiteboard video needs structure before it needs drawings.
For our solar-panel example, a simple explanation might contain:
Scene 1
Sunlight reaches the solar panels.
Scene 2
Solar cells convert light into direct current.
Scene 3
An inverter converts the electricity.
Scene 4
The house uses the generated power.
Scene 5
Extra power can be stored or sent elsewhere.
This is already enough to begin planning the visual sequence.
The script plan should answer:
What does this scene need to explain?
not:
Which cool animation can we add?
In Novirec’s current Whiteboard workflow, the script-planning stage can structure the topic before the board is composed, helping later scenes and narration stay focused on the same explanation.
Step 3 — Give Every Scene One Main Job
One of the easiest ways to make a whiteboard video confusing is to overload each scene.
Suppose scene two attempts to show:
- the sun;
- solar panel construction;
- electrons;
- DC electricity;
- inverter;
- house;
- battery;
- power grid;
- savings calculation.
The viewer does not know where to look.
A better principle is:
One scene = one primary idea.
For example:
Scene 1
Main idea: Sunlight reaches the panel.
Scene 2
Main idea: The panel creates DC electricity.
Scene 3
Main idea: The inverter makes that electricity usable.
Now every scene has a clear purpose.
Step 4 — Write for the Screen, Not Like an Article
Whiteboard videos should not place paragraphs on the board.
The viewer is simultaneously:
- reading;
- watching animation;
- listening to narration.
Long text creates unnecessary competition.
Instead of:
Solar photovoltaic cells absorb photons emitted by sunlight and convert the resulting energy into electrical current.
The board might simply show:
Sunlight → Electricity
while the narrator explains the detail.
That separation is extremely important.
Good whiteboard text
- short headline;
- keywords;
- labels;
- numbers;
- brief supporting lines.
Better narration
- explanation;
- context;
- transitions;
- examples;
- nuance.
The board should make the idea scannable.
The narrator can make it understandable.
Step 5 — Decide What Should Be Visual
Ask:
What image would make this concept easier to understand?
For our example:
“Sunlight reaches the panels”
Useful visual:
- sun;
- rays;
- rooftop panels.
“Electricity flows to the inverter”
Useful visual:
- solar panel;
- arrow;
- inverter icon.
“The house uses the electricity”
Useful visual:
- house;
- lamp;
- appliances;
- directional arrows.
The visual does not need to be decorative.
It needs to help explain.
Step 6 — Choose the Right Asset Type
Different whiteboard elements need different animation methods.
Simple shapes and symbols
Examples:
- arrows;
- boxes;
- circles;
- charts;
- simple icons.
These can work well with true path-based drawing when compatible.
Text
Use progressive writing when the writing effect helps the viewer follow the explanation.
Complex illustrations
Characters, objects and detailed scenes may contain too much visual complexity for a literal stroke reconstruction.
A progressive simulated drawing effect can preserve the original illustration while still creating the familiar whiteboard feeling.
Static information
Not everything has to be drawn.
Some elements can simply:
- appear;
- fade;
- slide into the scene.
The goal is clarity, not forcing every asset into the same reveal effect.
Step 7 — Use Full Draw for Simple Deterministic Graphics
Full Draw is most useful when the asset contains clean vector paths that can actually be followed.
Examples include:
- arrows;
- basic diagrams;
- geometric symbols;
- simple charts;
- line icons.
The hand can follow the path while the stroke appears progressively.
This creates the most literal:
“someone is drawing this”
effect.
But it should be used where the geometry genuinely supports it.
A highly detailed illustrated character may contain hundreds of shapes and fills.
Trying to reproduce every visible contour as a real drawing path can create poor motion rather than better animation.
Step 8 — Use Simulated Draw for Rich Illustrations
This is where a different approach becomes useful.
Suppose your whiteboard scene contains:
a teacher standing beside a classroom board.
The source illustration already looks good.
You do not necessarily want to reconstruct the entire image from hundreds of artificial vector strokes.
Instead, the animation can preserve the original artwork and progressively reveal it while the hand follows a plausible drawing route.
The viewer experiences:
the illustration being drawn.
But the final appearance still matches the original source.
This is particularly useful for:
- people;
- detailed objects;
- cartoon illustrations;
- complex SVGs;
- raster artwork;
- rich scene elements.
It gives you the visual language of whiteboard animation without sacrificing the artwork.
Step 9 — Use Hand Reveal When Literal Drawing Is Not Appropriate
Some images simply are not suitable for a draw-on animation.
That does not mean they must suddenly appear.
A Hand Reveal effect can progressively uncover the visual as the hand moves across it.
Think of it almost like:
an eraser operating in reverse.
The hand moves.
The hidden image gradually becomes visible underneath it.
This works well for:
- raster images;
- complex SVGs;
- textured assets;
- graphics without usable drawing paths.
The animation still feels physically connected to the hand.
Step 10 — Use Slide In to Change the Visual Rhythm
If everything is drawn the same way, the video can become repetitive.
Slide In gives you another visual language.
For example:
Draw
A chart appears.
Write
“40% growth” appears above it.
Slide
A product box enters from the right.
The hand can visually push the element onto the board.
This gives the scene more variation without abandoning the whiteboard style.
You can use slide motion for:
- images;
- text;
- cards;
- labels;
- visual examples;
- supporting assets.
Step 11 — Think About Reveal Order
Imagine this scene contains:
- headline;
- solar panel;
- sun;
- arrow;
- inverter;
- label.
Which appears first?
The answer should follow the explanation.
For example:
1. Sun
↓
2. Solar panel
↓
3. Arrow
↓
4. Inverter
↓
5. Label
The sequence itself teaches the process.
If all five appear simultaneously, the viewer receives the answer before the explanation begins.
Whiteboard animation works because information is sequenced.
Step 12 — Coordinate the Hand with the Content
The hand is not merely decoration.
It tells the viewer:
Look here now.
That creates visual attention.
When the hand writes a label, follows an arrow or reveals an illustration, the viewer naturally follows the movement.
Use that intentionally.
Avoid unnecessary movement across large empty areas.
Avoid making the hand jump erratically between unrelated parts of the board.
The path should support the communication.
Step 13 — Keep Important Elements Inside a Clear Composition
A whiteboard scene should remain readable even after all its elements are visible.
A useful structure might be:
Headline at top
↓
Main visual in center
↓
Supporting labels around it
Or:
Problem on left
→
Process in center
→
Result on right
Or:
Step 1
→
Step 2
→
Step 3
Avoid filling every empty space.
Whitespace is useful.
It helps the viewer distinguish groups of information.
Step 14 — Preview the Scene Before Adding Voice
Once the elements and animation are ready, watch the scene silently.
Ask:
- Is the order understandable?
- Is any animation too fast?
- Does the hand cover important information?
- Is there enough time to read the text?
- Does the final board look clean?
- Is the main idea obvious?
If the visual explanation does not work silently, narration may not fix it.
Solve the visual structure first.
Step 15 — Write Narration That Complements the Board
Now add the voice-over.
Suppose the board says:
DC Electricity
The narrator can say:
“The solar cells convert energy from sunlight into direct-current electricity, usually called DC power.”
The text gives the viewer an anchor.
The voice gives the explanation.
Avoid:
Board:
Solar cells convert sunlight into direct-current electricity.
Narrator:
“Solar cells convert sunlight into direct-current electricity.”
That simply reads the board aloud.
A better principle is:
Board = key idea. Voice = explanation.
Step 16 — Let AI Draft the Narration, Then Review It
AI can help create narration from the scene plan and existing board content.
But narration should still be reviewed before generating the voice.
Check:
- Is it factually correct?
- Does it repeat the visible text unnecessarily?
- Does it transition naturally from the previous scene?
- Is the vocabulary appropriate for the audience?
- Is it short enough for the scene?
- Does it sound natural when spoken aloud?
The narration text remains an editorial decision.
AI should accelerate the writing, not remove your control over what is actually said.
Step 17 — Generate Voice Only After the Text Is Ready
It is inefficient to repeatedly regenerate audio while the wording is still changing.
Use:
Draft
↓
Review
↓
Edit
↓
Generate voice
↓
Preview
↓
Approve
That keeps the workflow simple.
The voice should be generated intentionally after the narration is good enough to hear.
Step 18 — Match the Scene Duration to the Voice
Suppose the visual animation ends after six seconds.
But the narration requires nine seconds.
The scene cannot simply cut after six seconds.
A good Whiteboard workflow needs enough time for:
- drawing;
- narration;
- final readability;
- transition.
Likewise, if the animation takes twelve seconds and the narrator finishes after four, the viewer may sit through a long silent drawing sequence unnecessarily.
Timing should balance both.
The goal is not:
make every scene exactly five seconds.
The goal is:
give each idea enough time to be understood.
Step 19 — Leave a Small Pause After Important Explanations
Imagine the narration ends exactly when the last word appears.
The scene immediately changes.
The viewer has no time to absorb the completed board.
A short final hold can help.
For example:
Narration ends.
↓
Completed scene remains visible briefly.
↓
Transition.
This is especially useful when the scene contains:
- a formula;
- final diagram;
- comparison;
- number;
- key takeaway.
Give the viewer a moment to see the complete idea.
Step 20 — Decide Whether You Need Subtitles
Narration does not automatically mean subtitles must be visible.
They solve different problems.
Use captions when they help:
- accessibility;
- silent viewing;
- social content;
- difficult terminology;
- language comprehension.
Leave them off when:
- the board already contains substantial text;
- subtitles would obscure important visuals;
- you want a cleaner explainer style.
The Whiteboard itself and the subtitle system should remain separate.
That allows you to use:
Narration ON
with:
Captions OFF
when appropriate.
Step 21 — Add Music Carefully
Whiteboard explainers generally do not need aggressive music.
The viewer’s attention should stay on:
- explanation;
- drawings;
- narrator.
Music can create:
- energy;
- friendliness;
- professionalism;
- emotional rhythm.
But keep it secondary.
If the narrator becomes difficult to hear, the music is too loud.
A good audio mix can reduce music during narration and let it rise slightly during silent moments.
Step 22 — Use Transitions Between Scenes
Each whiteboard scene is part of a larger explanation.
Simple transitions are usually enough.
Cut
Immediate transition.
Useful for:
- fast explainers;
- highly structured steps;
- short-form content.
Fade
Soft visual change.
Useful for:
- changes in topic;
- calmer pacing.
Crossfade
One scene blends into the next.
Useful when:
- sections are strongly connected;
- you want smoother visual continuity.
Avoid choosing a transition simply because it looks impressive.
It should support pacing.
Step 23 — Watch the Entire Whiteboard Video
Now stop judging individual scenes.
Watch the complete sequence.
Ask:
Story
Does the explanation have a clear beginning and ending?
Structure
Does every scene logically lead to the next?
Visual clarity
Can the viewer tell where to look?
Timing
Does anything feel rushed or slow?
Narration
Does the voice explain rather than repeat?
Animation
Are drawing effects helping comprehension?
Audio
Is the narrator always clear?
Ending
Does the final scene communicate the takeaway?
A collection of good scenes does not automatically create a good explainer.
The complete sequence is what matters.
Step 24 — Fix the Largest Problem First
Do not rebuild the entire project because one part feels wrong.
Suppose:
- scenes 1–4 are excellent;
- scene 5 is overloaded;
- scene 6 works.
Fix scene five.
Or perhaps every scene works but the introduction is too slow.
Fix the introduction.
Iterate according to impact.
This makes production much more manageable.
Step 25 — Export the Final Whiteboard Video
Once:
- scenes are complete;
- narration is approved;
- timing works;
- captions are configured;
- music is balanced;
- transitions are selected;
you can export the complete project as a video.
The result is not simply an animated canvas.
It is a structured explainer containing:
script
visual communication
hand-drawn motion
narration
timing
final video assembly
That is the difference between a drawing effect and a complete Whiteboard Video workflow.
Example: Creating a 6-Scene Whiteboard Explainer
Suppose the topic is:
Why small businesses need regular data backups.
A possible structure:
Scene 1 — The problem
Board
Computer + warning icon.
Headline
What if everything disappeared?
Narration
“A hardware failure, ransomware attack or simple human mistake can erase years of business data.”
Scene 2 — What needs protection
Board
Files, customer data, invoices, projects.
Animation
Icons revealed one by one.
Narration
“The information at risk is often much broader than people expect.”
Scene 3 — Backup principle
Board
Computer → backup copy.
Animation
Arrow drawn between systems.
Narration
“A backup creates a separate copy that can be restored when the original becomes unavailable.”
Scene 4 — Multiple copies
Board
Three storage locations.
Narration
“Important data should not depend on a single device or location.”
Scene 5 — Automation
Board
Calendar + cloud icon.
Animation
Calendar writes on, cloud slides in.
Narration
“Automatic backups reduce the risk of discovering too late that someone forgot to make a copy.”
Scene 6 — Takeaway
Board
Back up before you need it.
Narration
“The best time to test a backup is before an emergency.”
Simple.
Clear.
Each scene has one purpose.
AI Whiteboard vs Traditional Manual Whiteboard Production
| Traditional workflow | AI-assisted workflow |
|---|---|
| Write script manually | AI can assist script planning |
| Storyboard manually | Scenes can be structured from the topic |
| Create every asset separately | Reuse library and generated assets |
| Animate every reveal manually | Dedicated draw/reveal modes |
| Record or source voice-over | TTS can generate narration |
| Synchronize manually | Timing workflow coordinates voice and scene |
| Edit music/captions separately | Polish stage centralizes these choices |
| Assemble final video | Export complete sequence |
AI does not remove creative decisions.
It reduces repetitive production work around them.
You still decide:
- what matters;
- what the audience should understand;
- which visuals are appropriate;
- what the narrator should say;
- what the final video should feel like.
What Makes a Good AI Whiteboard Video?
A strong Whiteboard Video usually has five qualities.
1. One clear objective
The viewer knows what they are learning.
2. Progressive information
The board reveals concepts in a logical order.
3. Concise text
The screen supports rather than duplicates narration.
4. Purposeful motion
Drawing and hand movement direct attention.
5. Natural timing
The viewer has enough time to see, hear and understand.
Adding more assets does not necessarily improve the result.
Clarity wins.
Common AI Whiteboard Mistakes
Putting too much text on screen
Write keywords and key points instead of paragraphs.
Making every asset use the same effect
Mix drawing, reveal and slide motion according to the content.
Using complex assets as literal line drawings
Use a reveal method appropriate to the source artwork.
Writing narration that reads the board
Let voice add context and explanation.
Animating before the scene structure is clear
Plan the explanation first.
Making the hand move unnecessarily
Motion should guide attention.
Forgetting final readability
The completed scene should still look good after the animation ends.
Adding subtitles automatically
Use them only when they improve the viewing experience.
Choosing music that competes with narration
Voice remains the priority.
Exporting before watching the full sequence
Individual scenes can hide pacing problems that become obvious in the complete video.
How Long Should an AI Whiteboard Video Be?
There is no ideal universal duration.
A short social explainer may last:
30–60 seconds.
A product explanation might use:
1–3 minutes.
Educational content can be longer when the topic requires it.
Instead of aiming for a fixed duration, ask:
How much information can this audience comfortably understand?
Then remove anything unnecessary.
A concise two-minute explanation is better than a five-minute video padded with extra scenes.
Can AI Create the Entire Whiteboard Video Automatically?
AI can automate or assist many stages.
But completely automatic does not always mean better.
A useful workflow still benefits from human approval at key points:
Is the script correct?
Does the board communicate the idea?
Are the visuals appropriate?
Does the narration sound right?
Is the pacing comfortable?
Automation works best when it removes repetitive work while keeping those decisions visible.
Can You Use Complex Images in Whiteboard Animation?
Yes.
A modern Whiteboard workflow does not need to be limited to basic line-art icons.
Complex illustrations can be animated using reveal techniques that preserve the final artwork rather than forcing the image into an inaccurate vector reconstruction.
This makes it possible to use:
- characters;
- educational illustrations;
- objects;
- richer visual scenes.
Simple SVG assets can still use genuine stroke-based drawing where appropriate.
The animation mode should match the asset.
Do Whiteboard Assets Need a Transparent Background?
Not always, but transparent assets are often easier to integrate into a clean board composition.
If an image contains an unnecessary background, removing it first can make the result much easier to position alongside:
- text;
- arrows;
- diagrams;
- other characters.
Novirec also provides a public Remove Background tool for preparing image assets before using them elsewhere in Studio.
Should Whiteboard Assets Be SVG?
SVG can be useful because vector graphics:
- scale cleanly;
- can contain actual paths;
- are easier to recolor or manipulate in some workflows.
But an SVG file is not automatically drawable.
Complex SVGs can contain:
- filled shapes;
- masks;
- transformations;
- embedded images;
- structures that do not correspond to visible drawing strokes.
When you need an editable vector version of a raster image, you can try Novirec’s public Vectorize Image tool.
The final animation method still depends on the resulting asset structure.
Can an AI Whiteboard Video Have Voice-Over?
Yes.
Narration is particularly useful because it lets the board remain concise.
The viewer sees:
3 Key Benefits
while the narrator explains each one in more detail.
This reduces the amount of visible text and creates a much more natural explainer format.
Voice can also be combined with optional subtitles, music and scene transitions.
Can You Make Whiteboard Videos Without Drawing Skills?
Yes.
The purpose of an AI-assisted workflow is not to require the user to manually illustrate every element frame by frame.
You still need to make communication decisions, but you can work with:
- reusable assets;
- generated illustrations;
- icons;
- text;
- automatic drawing/reveal effects;
- AI-assisted script and narration.
That makes the format much more accessible to:
- marketers;
- teachers;
- trainers;
- founders;
- content creators;
- small businesses.
Frequently Asked Questions
What is the easiest way to create a whiteboard video with AI?
Start with the topic and audience, generate a simple scene plan, turn each scene into concise text and visuals, choose an appropriate reveal animation, add narration, review timing and then export the completed sequence.
Can AI turn a script into a whiteboard animation?
AI can help structure a script into scenes, identify the key point of each scene and prepare visual/narration content. The scenes still benefit from review so the final visual explanation remains clear.
Does every image need to support Draw On?
No. Clean vector assets may support literal drawing, while complex illustrations can use simulated drawing or progressive hand-reveal effects.
Can I add narration to an AI whiteboard video?
Yes. Narration can explain the information that would otherwise make the board too text-heavy. It can be combined with optional captions, music and transitions.
Can I use my own images in a whiteboard video?
Yes. Images can be prepared for the composition and animated using the reveal mode best suited to their structure.
Can AI whiteboard videos include characters?
Yes. Complex character illustrations do not need to be reduced to simple line drawings. They can be progressively revealed while preserving their original appearance.
What format should I export a whiteboard video in?
MP4 is a practical final format for websites, presentations, social platforms and general video publishing.
Create Your First Whiteboard Video with AI
The most effective AI whiteboard workflow is not:
upload a script and hope for a perfect video.
It is:
Define the idea
↓
Structure the explanation
↓
Create clear scenes
↓
Choose concise text and useful visuals
↓
Reveal each element intentionally
↓
Add narration
↓
Synchronize the pacing
↓
Polish the final sequence
↓
Export the MP4
AI makes each stage faster.
But the strength of the final video still comes from the quality of the explanation.
A good Whiteboard Video guides the viewer from:
“I don’t understand this”
to:
“Now it makes sense.”
That’s the standard every visual, animation and line of narration should serve.
Open Novirec Studio to start building your Whiteboard Video.
Need to prepare an asset first? You can remove an image background or convert an image to editable SVG directly with Novirec Quick Tools.
Ready to put this workflow into practice?
Open Novirec Studio and start creating with the same tools covered in this guide.