
Creating an AI video story is not the same as generating one impressive video clip.
A complete story needs a beginning, characters, connected scenes, visual continuity and a sequence that makes sense when everything plays together.
The easiest way to approach the process is to stop thinking:
“How do I generate my entire video?”
and instead think:
“What is the next creative decision I need to make?”
A practical AI story workflow looks like this:
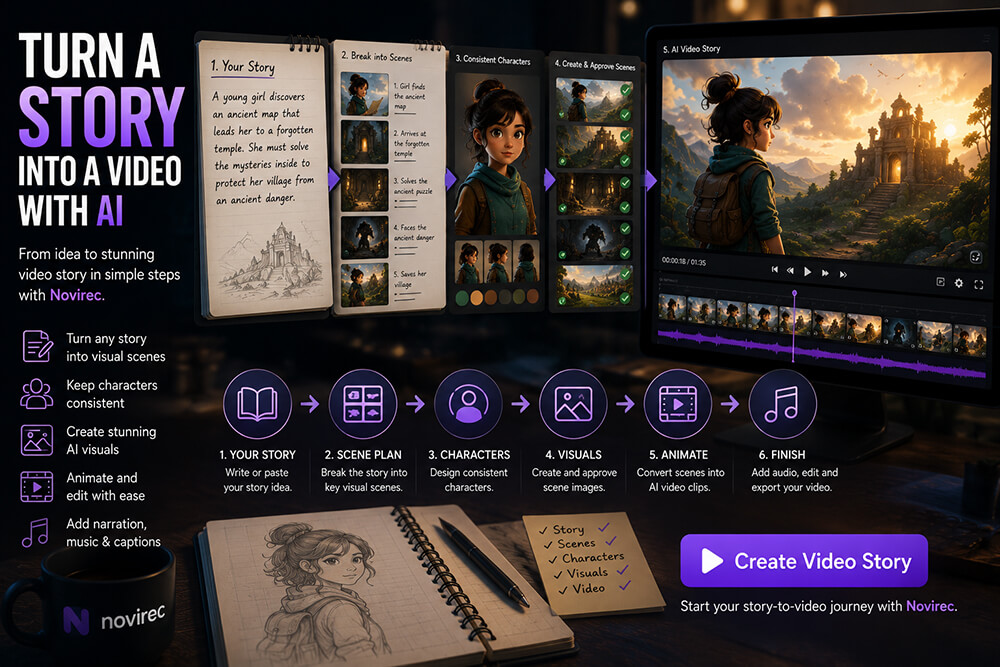
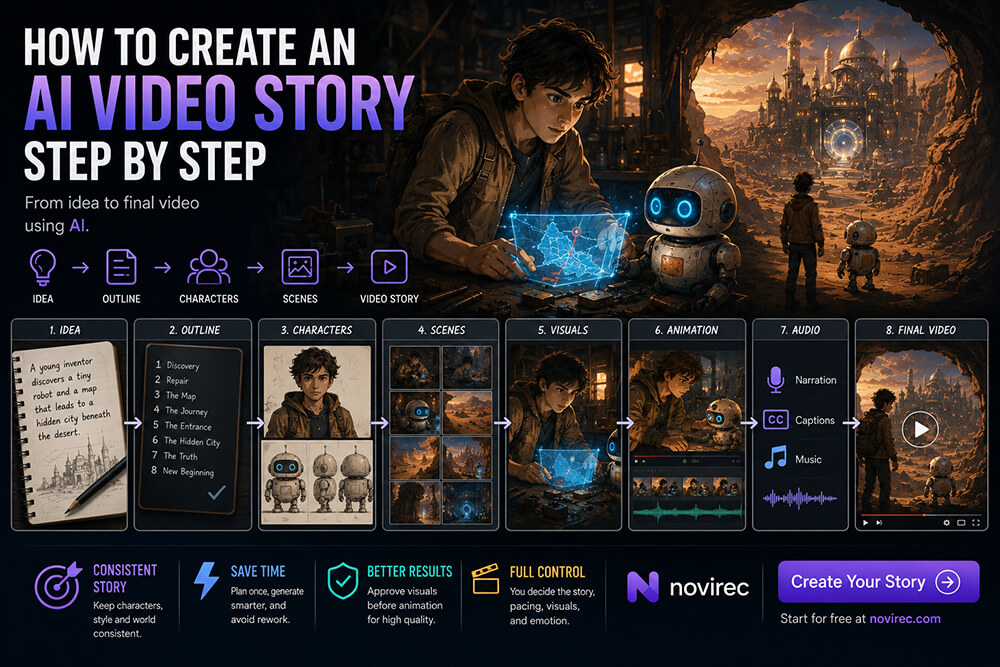
Idea → Outline → Characters → Scenes → Approved Visuals → Animation → Audio → Final Story
This tutorial walks through that process from beginning to end using a simple example, with an emphasis on keeping the workflow manageable even if you have never created an AI story video before.
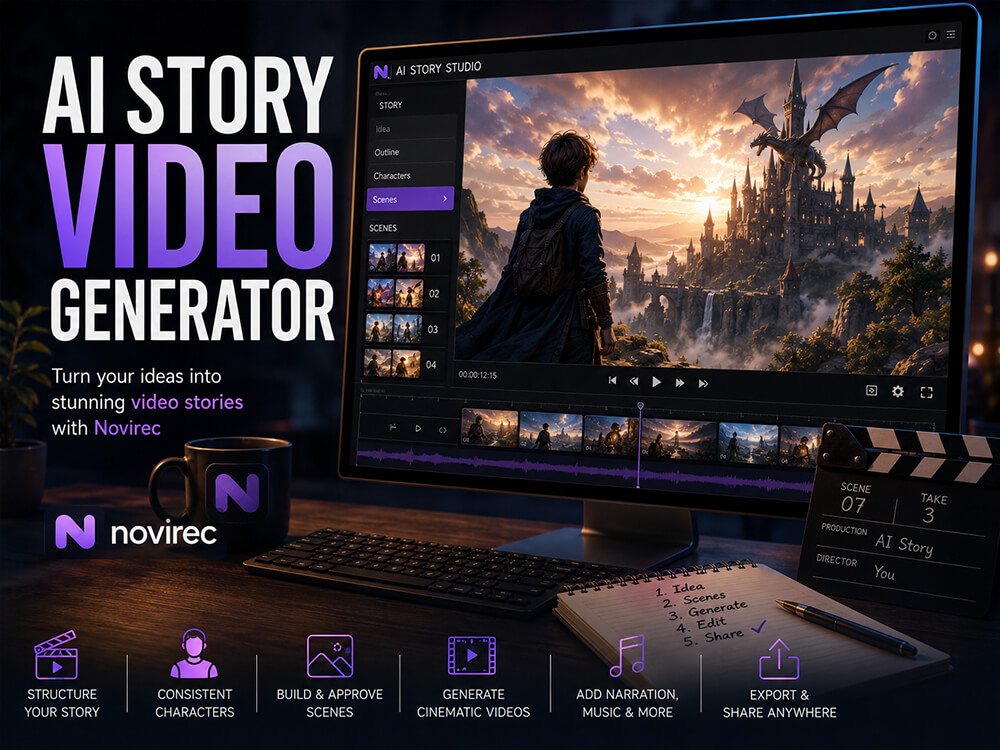
You can follow the same process inside Novirec Stories while building your own project.
The Example Story We Will Create
We will use one simple concept throughout the tutorial:
A young inventor named Noah discovers a tiny damaged robot in an abandoned workshop. While trying to repair it, he realizes that the robot contains a map leading to a hidden city beneath the desert.
The concept is intentionally simple.
We already have a protagonist, an important secondary character, a discovery, a destination and a reason for the story to move forward.
That is enough.
You do not need to write a complete screenplay before beginning.
What matters first is knowing what the audience is supposed to experience.
The Complete AI Video Story Workflow
| Stage | Main goal | Output |
|---|---|---|
| Idea | Establish the concept | Clear story premise |
| Outline | Organize the narrative | Sequence of important events |
| Characters | Define recurring identities | Approved character references |
| Scenes | Convert the outline into visuals | Planned story moments |
| Images | Establish compositions | Approved scene visuals |
| Animation | Add meaningful motion | Video clips |
| Audio | Add narrative and emotion | Voice, captions, music |
| Assembly | Build the sequence | Finished video story |
| Review | Fix continuity and pacing | Final approved version |
The important principle is that each stage reduces uncertainty for the next one.
Trying to solve all of them simultaneously usually makes AI storytelling harder than it needs to be.
Step 1 — Start with One Clear Story Idea
Do not start with camera settings or video models.
Start with the story.
A useful idea can often be expressed in one or two sentences.
Our example is:
Noah discovers a damaged robot containing a map to a hidden underground city.
That gives the project direction.
Compare it with:
Make an epic cinematic science-fiction video.
The second prompt describes a style, but not a story.
A story concept usually benefits from four basic elements: someone, a goal or discovery, an obstacle or mystery, and some form of change.
For Noah, those are already present.
Someone: Noah.
Discovery: a mysterious robot.
Mystery: the hidden map.
Direction: finding the city.
You now have enough material to begin shaping the narrative.
Step 2 — Create a Simple Beginning, Middle and Ending
Beginners often make one of two mistakes.
Either they start generating immediately with almost no story structure, or they spend days writing an extremely detailed script before seeing a single visual.
You can start in the middle.
Define three broad sections.
Beginning
Noah enters an abandoned workshop and discovers the robot.
Middle
He repairs it, discovers the map and follows its coordinates through the desert.
Ending
Noah reaches the hidden underground city and learns why the robot was trying to find him.
That is already a story arc.
You can refine it later.
The purpose of the outline is not to lock every creative choice forever. It gives the project a destination so that each generated scene contributes to something larger.
Step 3 — Turn the Outline into Story Scenes
Now convert the broad narrative into moments that can actually be shown.
For our example, we might create eight scenes.
Scene 1 — The abandoned workshop
Noah explores the workshop at sunset.
Scene 2 — The discovery
He finds a small damaged robot under an old workbench.
Scene 3 — The repair
Noah repairs the robot at his desk.
Scene 4 — The map
The robot projects a holographic desert map.
Scene 5 — The journey
Noah and the robot travel across the desert.
Scene 6 — The entrance
They discover a gigantic buried doorway.
Scene 7 — The underground city
The doorway opens onto an illuminated city beneath the desert.
Scene 8 — The reveal
The robot activates an ancient machine and Noah realizes his discovery was not accidental.
Notice that the eight scenes do not try to illustrate every second.
Each one represents a meaningful change in the narrative.
That is what makes them useful.
Step 4 — Decide What the Main Character Looks Like
Before generating scene after scene, establish Noah.
For example:
Noah is a 19-year-old inventor with short messy dark-brown hair, warm brown eyes and a slim build. He wears a sand-colored utility jacket over a charcoal shirt, dark trousers and brown boots. A small mechanical toolkit hangs from his belt.
The purpose is not to create an enormous character description.
You simply need stable visual anchors.
His dark messy hair, utility jacket and toolkit are particularly useful because they can remain recognizable even when his face is not clearly visible.
Create an initial visual reference and choose the version that best represents your intended protagonist.
That version becomes the reference point for future scenes.
Novirec Stories currently places character preparation before scene production and uses a Character Bible as a canonical visual reference for appearance, outfit, palette and continuity.
Step 5 — Define the Robot as a Recurring Character Too
Characters do not need to be human.
The robot is equally important to our story.
We might define it as:
A small rounded white service robot, approximately knee height, with two circular blue digital eyes, one short antenna, an orange chest panel and visible scratches along its left side.
Those details matter.
If scene two shows a rounded white robot and scene five suddenly contains a tall silver humanoid machine, the audience may interpret it as another character.
Treat recurring creatures, robots and mascots with the same consistency discipline you would use for a human protagonist.
Step 6 — Establish the Visual Style
Before producing eight scenes, choose a broad visual direction.
For this story we might select:
Cinematic stylized science-fiction illustration, warm desert colors, detailed environments, slightly animated-feature character design.
The exact wording is less important than consistency.
Your first scene should not look like a 3D animated film while the second looks like watercolor and the third looks photorealistic unless that shift is intentional.
Style is part of continuity.
It determines whether the scenes feel like parts of the same production.
Step 7 — Create the First Scene Image
Now we can begin building the actual visual story.
For scene one, the important information is simple:
Noah is inside the abandoned workshop at sunset.
A useful visual description could be:
Wide cinematic view of Noah exploring an abandoned mechanical workshop filled with old tools, broken machines and dusty shelves. Warm sunset light enters through tall damaged windows. Noah wears his sand-colored utility jacket and carries his small toolkit. Curious, mysterious atmosphere.
This scene establishes the protagonist and the world.
Do not worry about motion yet.
First decide whether the image itself works.
Does Noah look correct?
Does the workshop communicate the intended mood?
Is the composition readable?
If not, solve those issues now.
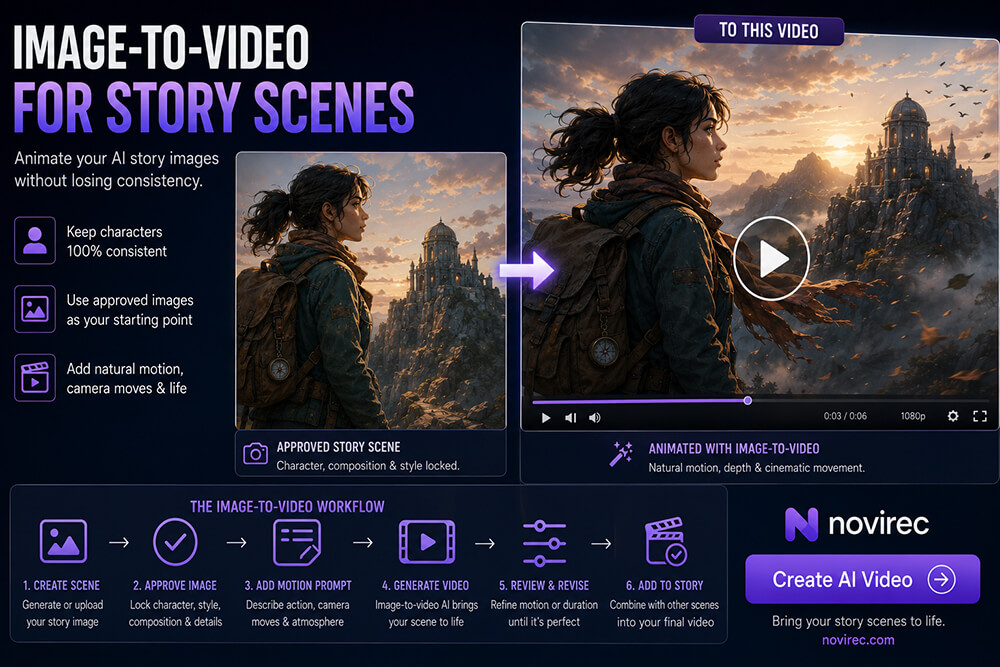
Step 8 — Approve the Image Before Animating It
This single habit can save a large amount of unnecessary work.
Imagine you immediately animate the first generation.
After generating several video variations, you realize Noah’s jacket is wrong.
You now need to correct both the visual and the animation.
Instead, use:
Generate image → Review → Approve → Animate
The approved image becomes your visual foundation.
Check identity, wardrobe, important props, composition, location and style before moving forward.
This becomes increasingly valuable as the story grows.
Step 9 — Create the Remaining Scene Images
Continue through the story one scene at a time.
Scene four, for example, might show:
Noah and the repaired robot inside the dark workshop. The robot projects a glowing holographic map above its chest while Noah leans forward in amazement. Blue holographic light contrasts with warm workshop lighting.
Scene seven might show:
Noah and the small robot standing on a massive stone platform overlooking an enormous underground city illuminated by golden lights beneath the desert. Wide cinematic reveal, overwhelming scale.
Those two images should look very different.
But Noah and the robot should remain recognizable.
This is the balance you are aiming for:
new scene, same world.
Step 10 — Review Continuity Before Starting Video Generation
Once the main scene images exist, look at them together.
Do not inspect them only one by one.
Ask whether the complete sequence feels connected.
Compare Noah’s face, hairstyle, jacket and proportions.
Compare the robot’s shape, eyes, antenna and chest panel.
Check recurring objects.
Look at the story state.
For example, if the robot is visibly damaged in scenes two and three but fully repaired in scene five, scene four should make the repair understandable.
The sequence should visually reflect what has happened.
Fixing these problems while everything is still composed of images is usually much easier than discovering them after animation.
Step 11 — Decide Which Scenes Actually Need Motion
Not every image requires dramatic movement.
For each scene, identify what needs to happen.
In scene two:
Noah kneels beside the robot and brushes dust from its face.
In scene four:
The robot’s chest opens and a holographic map gradually appears.
In scene five:
Noah walks across the desert while the robot follows.
In scene seven:
The camera slowly pushes forward as the underground city becomes visible.
These are very different motion requirements.
The animation should reinforce the narrative event.
Do not add random camera movement simply because the video model can move the camera.
Step 12 — Choose Between Text-to-Video and Image-to-Video
Both workflows can be useful.
Text-to-video starts primarily from a written description.
Image-to-video starts from an existing image and adds motion.
For a story where character and scene continuity matter, an approved image can be particularly valuable because several creative decisions have already been established before animation begins.
| Situation | Good starting point |
|---|---|
| Approved character-heavy scene | Image-to-video |
| Precise composition must remain recognizable | Image-to-video |
| Recurring location is important | Image-to-video |
| Experimental atmospheric shot | Text-to-video can work well |
| No recurring character visible | Either |
| Exploring several visual possibilities | Text-to-video |
| Continuing from an approved story image | Image-to-video |
Novirec also provides a dedicated AI video creation workflow for individual text-to-video and image-to-video generations.
Step 13 — Write Motion Prompts That Describe What Changes
A motion prompt does not need to redescribe the entire image.
The image already establishes much of the visual information.
Focus on the change.
For example:
Noah slowly reaches toward the damaged robot. The robot’s blue eyes flicker weakly. Dust particles drift through the warm sunset light. Subtle slow camera push.
That tells the video model what should move.
A weaker motion prompt might be:
Epic cinematic movement, beautiful camera, amazing animation.
Those words communicate style but very little specific motion.
Think in terms of:
subject movement + camera movement + environmental movement.
Step 14 — Keep Motion Simple When Continuity Matters
Complex movement creates more opportunities for visual instability.
If the purpose of a shot is simply to reveal information, it may not need:
spinning camera + running character + exploding environment + major transformation.
For example, the holographic-map scene could work with:
robot remains mostly stationary, hologram expands upward, Noah leans closer, subtle camera push.
That may communicate the story better than excessive motion.
Complexity should serve the scene.
Step 15 — Generate Short Shots First
Do not assume every story scene needs the longest available duration.
A story is usually assembled from multiple shots.
A simple reveal may only require a few seconds.
A slow emotional moment may deserve longer.
An action sequence can work better as several shorter clips.
For beginners, shorter controlled shots are often easier to review and replace.
You can always expand the sequence later.
Step 16 — Review the First and Last Moments of Every Clip
When evaluating a generated video, do not only watch the middle.
Pay attention to how it begins and ends.
The beginning needs to make sense relative to the previous scene.
The ending needs to provide a usable transition toward the next one.
A visually impressive clip can still be difficult to use if its final frame dramatically changes the character or composition.
Think about each clip as one piece of an edit.
Step 17 — Assemble the Clips in Story Order
Once the animations are approved, place them in narrative order.
Now watch the sequence without stopping.
You are looking for a different class of problems.
Does the opening move too slowly?
Does the desert journey happen too quickly?
Does the underground-city reveal have enough time to feel important?
Does one scene repeat information that another scene already communicated?
Editing changes your perception of the individual shots.
A five-second clip can feel perfect alone but too long inside the complete story.
Step 18 — Add Narration Only Where It Helps
Narration can communicate information that would otherwise require additional scenes.
For example:
Noah had spent years searching abandoned workshops for machines worth saving. He never expected one of them to be waiting for him.
That adds context while the audience watches the visual sequence.
Narration is especially useful for backstory, transitions, internal thoughts and information that is difficult to communicate visually.
But avoid describing exactly what the viewer already sees.
If Noah picks up the robot, narration does not need to say:
Noah picked up the robot.
Use the voice to add information the image cannot provide.
Step 19 — Use Dialogue Selectively
Dialogue can make characters feel alive, but not every AI video story needs constant conversation.
For example, after the robot activates:
Noah: “Who built you?”
The robot could respond through a digital display rather than voice.
That may fit the visual world better.
Dialogue should serve the story, not simply fill silence.
If narration, visuals and music already communicate everything needed, additional dialogue may be unnecessary.
Step 20 — Add Captions for Readability
When your video contains narration or dialogue, captions can improve accessibility and make the story understandable when viewers watch without sound.
Prioritize readability.
Use enough contrast.
Avoid covering important faces or objects.
Keep the amount of text manageable.
Captions should support the story rather than competing visually with it.
Step 21 — Add Music After the Story Works
Music can dramatically improve the emotional impact of a video.
But it should not be used to hide weak pacing or unclear storytelling.
First make sure the sequence works.
Then choose music that reinforces the emotional progression.
Our story might begin with quiet mysterious music in the workshop, become more adventurous during the desert journey, grow in scale during the discovery of the doorway, and reach its strongest emotional moment during the underground-city reveal.
The soundtrack now follows the narrative arc.
Step 22 — Balance Voice and Music
If narration is important, music should not overpower it.
The viewer should never need to struggle to understand the story.
Think of the layers in priority order.
The voice communicates information.
Sound effects reinforce events.
Music establishes emotion.
They should complement each other.
If every layer competes for attention, the final video can feel exhausting.
Step 23 — Watch the Complete Video Without Editing
This is one of the most useful review methods.
Stop thinking like the creator for a moment.
Press play from the beginning.
Do not pause to fix anything.
Watch the entire story.
Then ask:
Did I understand what Noah wanted?
Did I recognize him from scene to scene?
Did the robot remain consistent?
Was any transition confusing?
Did the story slow down?
Was the underground-city reveal satisfying?
Did the ending feel complete?
Those questions matter more than whether every individual generation is technically impressive.
Step 24 — Fix the Biggest Problem First
Do not immediately regenerate everything.
Identify the weakest point.
Perhaps scene five looks visually inconsistent.
Perhaps the narration explains too much.
Perhaps the opening takes too long.
Perhaps the climax needs an additional shot.
Fix the largest problem.
Then watch again.
This iterative approach is much more manageable than continuously changing multiple parts of the story at once.
Step 25 — Export Only After the Story Works as a Sequence
The final video is not simply the sum of its generated clips.
What matters is the experience created when they are assembled.
Before export, verify character continuity, story order, timing, captions, audio balance and the ending.
Then produce the final version.
The technical generation process is complete only when the story itself works.
A Beginner-Friendly Rule for AI Video Stories
When you are unsure what to do next, use this rule:
Never solve the next production problem before the current one is good enough.
Do not animate a character you have not approved.
Do not add music to a sequence whose pacing is broken.
Do not generate twenty scenes before confirming that the protagonist works.
Do not obsess over final export settings while the narrative is still unclear.
Move progressively.
That is what keeps a complex AI project manageable.
How Long Does It Take to Create an AI Video Story?
There is no fixed production time.
A simple six-scene video with one recurring character can be relatively straightforward.
A longer project with several characters, complex locations and numerous animation variations will naturally take more work.
The biggest factor is often not generation speed.
It is the number of decisions and corrections required.
A structured workflow reduces unnecessary iterations because you solve problems earlier.
Approve the character once instead of correcting them in ten later scenes.
Approve the scene before animating it.
Solve continuity before assembling the final video.
Those small decisions compound.
How Much Does an AI Video Story Cost?
The generation cost depends on choices such as the number of scenes, image models, video models, duration, resolution and how many alternatives you generate.
A useful way to control costs is to spend cheaper iterations earlier in the pipeline.
Plan before generating.
Approve images before video.
Animate only the scenes you actually need.
Keep the strongest generation instead of creating endless alternatives.
Visitors comparing options can view Novirec pricing, while existing users can manage their available credits from Studio Billing.
Common Beginner Mistakes
The most common mistake is starting with video generation instead of story structure. Another is generating the whole story before establishing the recurring characters. Many beginners also animate images before checking whether they are correct, use overly complicated motion in every shot, or judge clips independently without watching the complete sequence.
A better approach is intentionally slower at the beginning and much faster later.
Prepare the story.
Prepare the characters.
Approve the scenes.
Then spend your video generations where they actually matter.
Frequently Asked Questions
What is an AI video story?
An AI video story is a sequence of AI-assisted visual scenes organized into a narrative. Unlike a standalone AI video clip, the scenes are connected through characters, events, locations and story progression.
Do I need to write the entire story before creating the video?
No. A clear concept, beginning, middle, ending and basic scene outline are enough to begin. You can refine dialogue, narration and individual moments as the visual project develops.
Should I generate characters before scenes?
For recurring characters, this is usually the most controlled approach. Establishing the protagonist first gives later scenes a consistent visual reference.
Should I create images before AI video clips?
For continuity-sensitive scenes, approved images can give you more control over character appearance, composition and environment before motion is introduced.
How many scenes should my first AI video story have?
There is no required number, but a relatively short sequence is easier for a first project. Six to ten meaningful scenes can be enough to learn the full workflow without creating unnecessary complexity.
Can I add narration, captions and music?
Yes. Narration can provide context, captions improve readability and accessibility, and music can reinforce emotion. Add them after the core visual sequence works so audio supports the story rather than compensating for unclear structure.
Can I create an AI video story without filmmaking experience?
Yes. Basic storytelling decisions matter more at the beginning than technical filmmaking terminology. Focus on what the viewer needs to see, what changes in each scene and whether the story remains understandable.
Create Your First AI Video Story
The easiest way to create an AI story video is not to ask AI to create an entire movie at once.
Build it progressively.
Start with the idea.
Create the outline.
Establish your recurring characters.
Turn the story into scenes.
Approve the visuals.
Animate only what needs movement.
Add narration, captions and music when they strengthen the experience.
Then assemble everything and judge the result as a complete story.
That process turns AI video generation into visual storytelling.
Create a Story with Novirec and build your first project from idea to connected scenes.
Want to learn more about the format first? Explore Novirec AI Stories.
New to Novirec? Create your account and start your first visual story.
Ready to put this workflow into practice?
Open Novirec Studio and start creating with the same tools covered in this guide.