
A written story can describe an entire world in a few paragraphs. Turning that story into a video is different.
Every important moment has to become something the audience can actually see.
Characters need a recognizable appearance. Locations need to be established. The narrative must be divided into scenes. Each scene needs the right composition, and only then does it make sense to add motion.
That is why the most reliable way to turn a story into a video with AI is not to paste an entire story into a video generator and hope for the best.
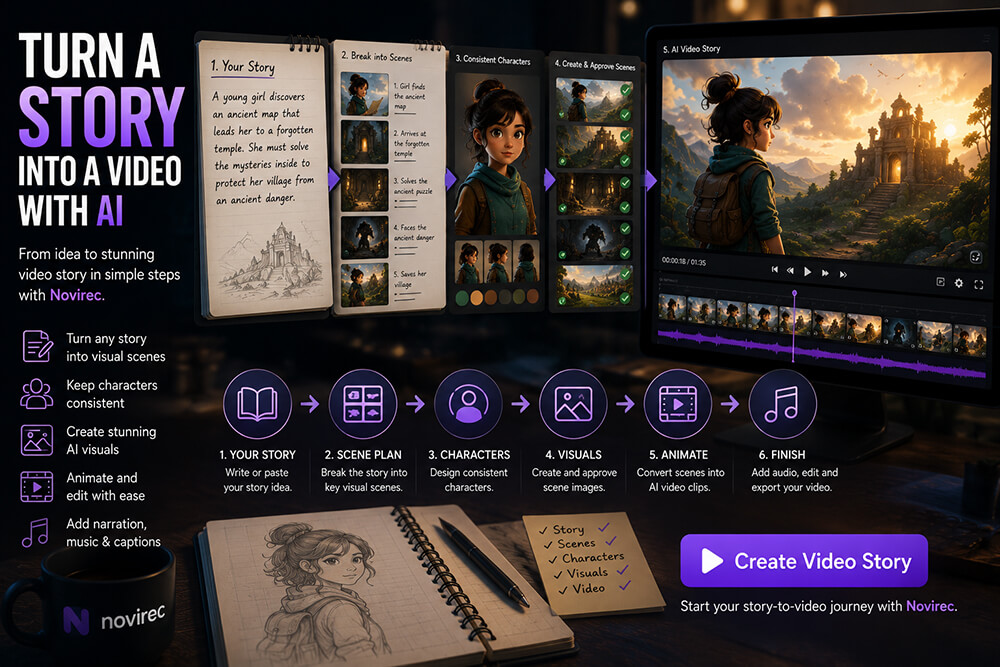
Instead, convert the narrative step by step:
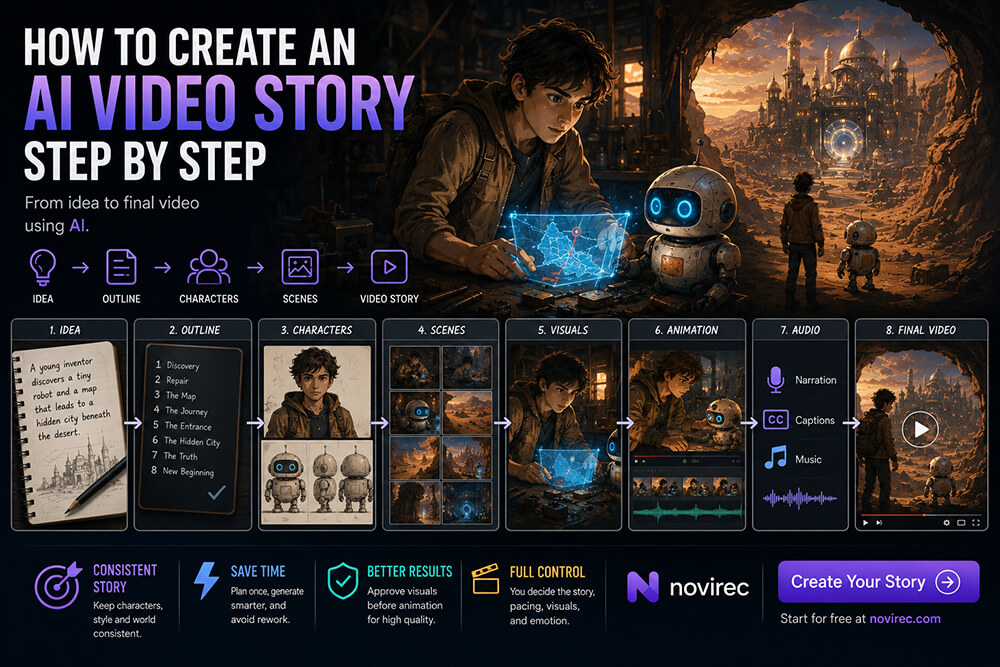
Story → Scenes → Characters → Visuals → Animation → Final Video
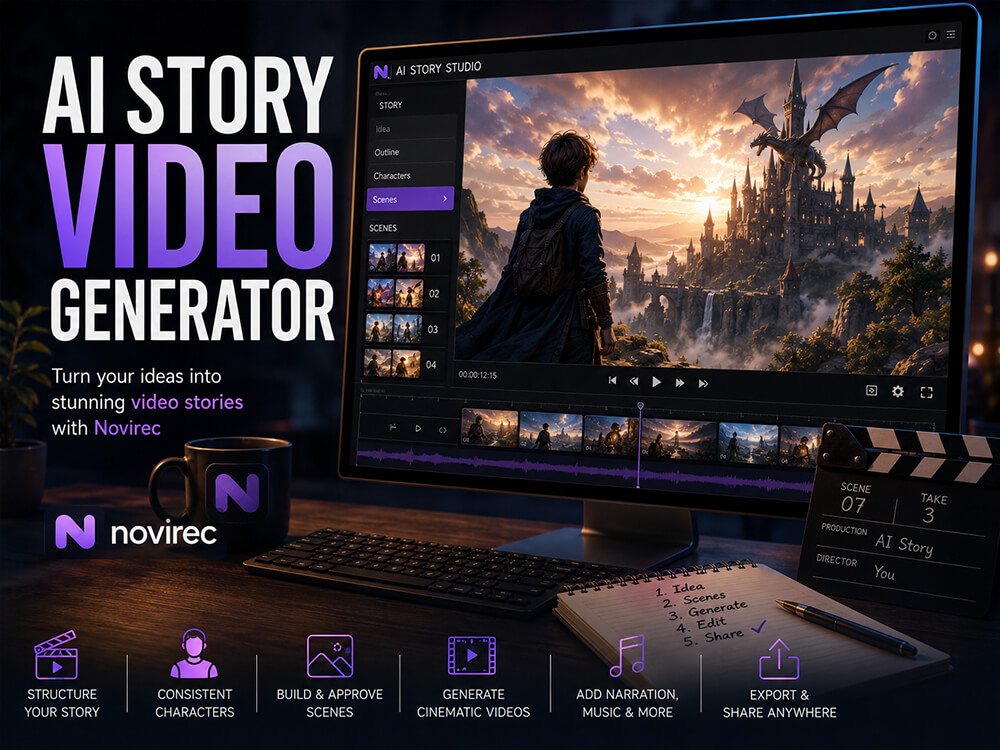
You can start a visual story in Novirec and build the project scene by scene instead of creating unrelated video clips.
Can AI Turn a Written Story into a Video?
Yes, but there is an important distinction.
AI can help generate:
- story scenes;
- characters;
- illustrations;
- individual video shots;
- narration;
- captions;
- visual variations.
But a complete story video is still a sequence.
If your story contains ten important moments, you usually need to decide how those ten moments should become visual scenes.
For example, take this short story:
A young astronomer discovers an unusual signal coming from an abandoned observatory. She travels there during a storm, repairs the old telescope and realizes that the signal is coming from an unknown planet.
A single prompt cannot reliably represent the entire narrative as one coherent video.
Instead, the story can become:
- The astronomer receives the strange signal.
- She studies its coordinates.
- She travels toward the abandoned observatory.
- A storm begins.
- She enters the damaged building.
- She repairs the telescope.
- The telescope activates.
- A mysterious planet appears.
- The signal becomes stronger.
- She realizes the discovery is real.
Now AI has a sequence of clearly defined visual tasks.
That is the foundation of story-to-video creation.
Story to Video Is Different from Text to Video
The terms may sound similar, but the workflows are not identical.
Text-to-video
A text-to-video generator usually receives a prompt such as:
A woman walks through an abandoned observatory during a lightning storm, cinematic lighting.
The goal is to produce one video clip.
Story-to-video
A story-to-video workflow has to understand that the observatory scene belongs to a larger narrative.
The woman may have appeared earlier.
Her clothes should remain consistent.
The telescope may have already been introduced.
The storm may have started in the previous scene.
And something that happens here may need to continue in the following shot.
A useful distinction is:
| Text-to-Video | Story-to-Video |
|---|---|
| Creates a clip | Creates a sequence |
| Prompt-centered | Narrative-centered |
| Little previous context required | Earlier scenes matter |
| Character continuity may be optional | Character continuity is important |
| Good for isolated shots | Better for connected stories |
If you only need one standalone clip, you can use Novirec’s AI video creation workflow.
If you are adapting an entire narrative, a structured Story project is more appropriate.
Step 1 — Start with the Story, Not the Video Prompt
Before thinking about video models, camera motion or duration, identify the core narrative.
You need to understand:
- who the protagonist is;
- what they want;
- what changes;
- where the story takes place;
- what creates conflict;
- how the story ends.
For example:
A small robot wakes up in an abandoned greenhouse. With its battery nearly empty, it must cross a ruined city to reach the last functioning charging station.
This gives you:
Character: small robot
Goal: reach charging station
Setting: abandoned greenhouse and ruined city
Conflict: battery running out
Progression: journey through increasingly difficult locations
Ending: reaches the station
That structure is much more useful than immediately asking an AI model for random cinematic shots.
Step 2 — Break the Story into Visual Scenes
Now identify which moments deserve to become scenes.
For the robot story:
Scene 1
The robot wakes among overgrown plants inside the greenhouse.
Scene 2
Its battery indicator flashes red.
Scene 3
It looks through broken glass toward the distant city.
Scene 4
The robot leaves the greenhouse.
Scene 5
It crosses an abandoned street.
Scene 6
A collapsed bridge blocks the route.
Scene 7
The robot finds another path through an old subway tunnel.
Scene 8
Its battery reaches almost zero.
Scene 9
The charging station becomes visible.
Scene 10
The robot connects to the station and its lights return.
Notice that each scene communicates something new.
That is important.
A story video should not consist of ten visually different shots that all communicate the same narrative information.
Every scene should either:
- introduce something;
- change something;
- reveal something;
- create a problem;
- solve a problem;
- move the character closer to the ending.
Step 3 — Remove Scenes That Do Not Need to Exist
Written stories can contain information that does not need a dedicated visual scene.
Consider:
The robot walked for almost three hours before reaching the old district.
You probably do not need a three-hour walking sequence.
That information could instead be communicated through:
- one transition;
- a short montage;
- narration;
- environmental change;
- a time-of-day change.
When converting text into video, ask:
Does the viewer need to see this moment?
If the answer is no, another storytelling technique may communicate it more efficiently.
This is one of the most important skills when converting a written story into a visual one.
Step 4 — Define the Recurring Characters
Before generating all your scenes, decide what the characters look like.
For the robot:
Body: small rounded white robot
Eyes: two blue circular digital eyes
Movement: two wheels
Chest: orange rectangular panel
Accessory: thin antenna with blue tip
Damage: visible scratch across left side
These features create identity.
If scene one shows a round white robot and scene six suddenly shows a tall humanoid machine, the audience may interpret it as a different character.
The same principle is even more important for human characters.
Decide:
- face;
- approximate age;
- hairstyle;
- clothing;
- colors;
- accessories;
- body proportions;
- distinctive features.
A strong character reference gives the rest of the story a visual anchor.
Step 5 — Create the Scene Images Before Animating Everything
This step can save a significant amount of unnecessary video generation.
Before turning every scene into motion, first establish what the scene should look like.
For each image, review:
- character appearance;
- composition;
- clothing;
- location;
- lighting;
- important objects;
- visual style;
- story continuity.
Suppose scene seven looks excellent, but the robot’s orange chest panel has disappeared.
Fix that problem before animation.
Otherwise, you may generate several video variations from an incorrect scene and waste additional time and credits.
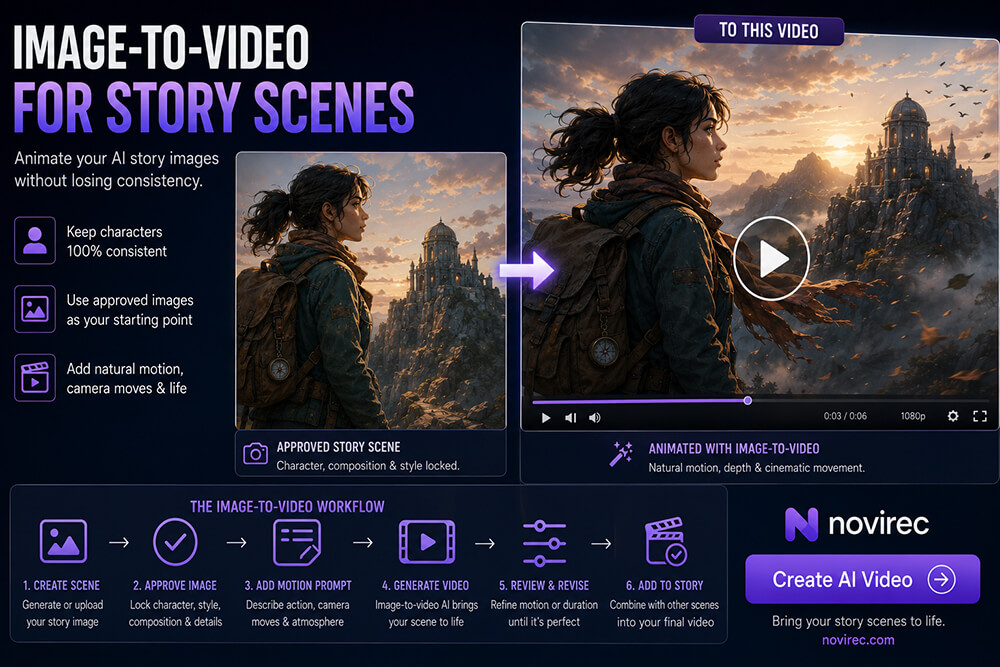
A strong story-to-video workflow therefore often looks like:
Generate → Review → Approve → Animate
instead of:
Generate Video → Regenerate Video → Regenerate Video Again
Step 6 — Decide What Should Move in Each Scene
A story scene is not improved simply by making everything move.
Motion should have a purpose.
For each scene, identify three possible layers:
Subject movement
What does the character or main object do?
Camera movement
Does the camera remain static, push forward, track, pan or move backward?
Environmental movement
What happens in the surrounding scene?
For example:
Robot slowly rolls toward the broken bridge. Camera tracks alongside it. Dust moves across the road in the wind.
This is more useful than:
Cinematic movement, dramatic dynamic camera, lots of motion.
Specific motion is easier to connect to the story.
Step 7 — Choose Image-to-Video or Text-to-Video
There is no single correct workflow for every shot.
Use image-to-video when:
- the character’s exact appearance matters;
- the scene composition has already been approved;
- the location must match previous scenes;
- important props need to stay visible;
- you want more visual continuity.
Use text-to-video when:
- you are still exploring the scene;
- precise continuity matters less;
- the shot contains no important recurring character;
- you need a standalone atmospheric shot.
For narrative projects, approved scene images can provide a useful foundation because much of the visual decision-making is already complete.
Step 8 — Think in Shots, Not Only Scenes
One written scene may require more than one video shot.
Example:
Maya enters the observatory and discovers the telescope.
That could become:
Shot 1 — Wide
Maya enters the large abandoned observatory.
Shot 2 — Medium
She walks through dust-covered equipment.
Shot 3 — Close-up
Her expression changes when she notices something.
Shot 4 — POV
The old telescope is visible beneath a torn cloth.
This produces much richer visual storytelling than trying to represent every event with one generic shot.
How to Turn Dialogue into Video
Written dialogue does not automatically need a close-up of someone speaking for every line.
Suppose the story says:
“We should never have come here,” Daniel whispered.
Several visual treatments are possible.
Option 1 — Character shot
Show Daniel delivering the line.
Option 2 — Reaction shot
Show the other character reacting while Daniel speaks off-screen.
Option 3 — Environmental shot
Show the dangerous location while the dialogue continues.
Option 4 — Narrated adaptation
Rewrite the information as narration if spoken dialogue is not important.
Visual storytelling gives you more options than literal illustration of every sentence.
Add Narration When the Story Needs Context
Narration is particularly useful when converting prose into video.
Written fiction can explain internal thoughts easily.
Video cannot show everything directly.
For example:
She had been searching for the observatory for eleven years.
You could create multiple flashback scenes.
Or a narrator could communicate that information in a few seconds while the current scene continues.
Narration can help with:
- backstory;
- time jumps;
- internal thoughts;
- exposition;
- location changes;
- transitions;
- emotional context.
Use it when it reduces unnecessary scenes.
Do Not Narrate What the Viewer Can Already See
If the video clearly shows Maya opening the observatory door, avoid narration like:
“Maya opened the observatory door.”
Instead, provide new information:
“No one had entered the observatory since the night her father disappeared.”
The image communicates the action.
The narration communicates the context.
Together they tell more story than either could alone.
Use Captions and Subtitles Carefully
If narration or dialogue is present, captions can improve accessibility and make the video easier to understand without sound.
Good captions should:
- remain concise;
- match speech timing;
- use readable contrast;
- avoid covering faces;
- remain on screen long enough to read;
- avoid excessive visual animation.
Captions are part of the presentation, not decoration.
Music Can Transform the Same Visual Scene
Imagine the same shot:
A child enters an abandoned house.
With soft piano, the scene may feel sad.
With low drones, it feels frightening.
With whimsical strings, it may feel adventurous.
Music helps establish emotional interpretation.
When turning a written story into video, define the emotional role of important sequences:
- mysterious;
- hopeful;
- playful;
- tense;
- melancholic;
- triumphant.
Then choose audio that reinforces that function.
How Long Should Each Story Video Scene Be?
There is no universal ideal duration.
Instead, ask:
How long does the audience need to understand this shot?
A simple landscape establishing shot may only need a few seconds.
A significant emotional moment may deserve more time.
An action sequence may work better as several short clips.
Avoid stretching a shot solely because the video model supports a longer duration.
Narrative pacing matters more than maximum clip length.
Create Visual Rhythm by Varying Shot Size
A video becomes monotonous if every scene is framed identically.
Use combinations of:
Establishing shots
Show where the story takes place.
Wide shots
Show character and environment together.
Medium shots
Show action clearly.
Close-ups
Emphasize emotion.
Detail shots
Highlight important objects.
Over-the-shoulder shots
Connect the character to what they are seeing.
For example, a discovery sequence might use:
- wide shot of the ruined temple;
- medium shot of the explorer approaching;
- close-up of the explorer’s expression;
- detail shot of a glowing symbol;
- over-the-shoulder view of the door opening.
That sequence tells the story visually.
Keep Characters Consistent Across the Video
Character inconsistency becomes especially noticeable when two clips play consecutively.
Check:
- face;
- hairstyle;
- clothing;
- accessories;
- height and proportions;
- color palette;
- age;
- visual style.
If something changes intentionally, make sure the story communicates why.
For example:
Scene 2: character wears clean white shirt.
Scene 7: shirt is dirty and torn after an accident.
That is visual progression.
But if the shirt randomly becomes blue in scene three and red in scene four, that is drift.
Keep the World Consistent Too
A character can look perfect while the rest of the story still feels disconnected.
Review recurring:
Locations
Does the same room retain its layout?
Objects
Does the vehicle, book, weapon or device remain recognizable?
Time of day
Does lighting progress logically?
Weather
Does a storm continue between consecutive scenes?
Damage
If a building breaks in one scene, does it remain damaged afterward?
Story state
If the protagonist loses an object, it should not magically return in the next shot.
Continuity is a property of the entire visual world.
A Practical Story-to-Video Workflow
Here is a simplified production sequence.
| Stage | Goal |
|---|---|
| 1. Story | Define the narrative |
| 2. Outline | Identify progression and major events |
| 3. Characters | Establish recurring visual identities |
| 4. Scenes | Turn events into visual moments |
| 5. Scene Images | Create compositions and approve continuity |
| 6. Video | Add meaningful motion |
| 7. Audio | Add narration, dialogue, captions and music |
| 8. Assembly | Put scenes in narrative order |
| 9. Review | Check pacing and continuity |
| 10. Export | Produce the finished video |
The value of this approach is that each stage solves a different problem.
You do not need to solve writing, character design, cinematography and motion simultaneously.
Common Mistakes When Turning a Story into AI Video
Pasting the Entire Story into One Prompt
Long narrative text is not the same as a useful video prompt.
Divide the story into visual units.
Generating Video Before Characters Are Defined
This often creates identity drift.
Prepare recurring characters first.
Animating Every Generated Image
Approve the still scene before spending resources on motion.
Making Every Shot Highly Dynamic
Movement should match the emotional purpose of the scene.
Using the Same Camera Angle Everywhere
Vary framing to create visual rhythm.
Keeping Every Sentence from the Original Story
Adaptation requires compression.
Some information is better communicated through narration, montage or visual implication.
Ignoring Continuity
Check characters, clothing, locations, props, lighting and story state.
Creating Too Many Scenes
A story video does not need a separate shot for every sentence.
Keep moments that advance the narrative.
How Much Does It Cost to Turn a Story into an AI Video?
The cost depends on the project.
A short story containing six scenes may require relatively few generations.
A larger cinematic project can involve:
- character preparation;
- multiple image generations;
- scene corrections;
- several video takes;
- longer clips;
- higher resolutions;
- additional audio work.
Generation requirements can therefore vary significantly depending on model and workflow choices.
Before signing up, you can compare Novirec plans.
If you already use the platform and need to purchase credits or change your plan, view plans and credits inside Studio.
Do You Need Filmmaking Experience?
No, but basic visual storytelling principles help.
You do not need to know every cinematography term.
Start with questions that are easier to understand:
- What does the viewer need to see?
- What changes during this scene?
- Is the character recognizable?
- What is the emotional purpose?
- What should happen next?
- Is this shot necessary?
A beginner-friendly workflow should gradually translate those creative decisions into actual images and video rather than requiring you to understand every technical setting before starting.
What Types of Stories Work Well as AI Videos?
Many formats can work, including:
- fantasy adventures;
- children’s stories;
- mysteries;
- educational narratives;
- short dramatic stories;
- science-fiction stories;
- historical-inspired fiction;
- motivational stories;
- faceless narrated content;
- visual social-media stories;
- animated comic-style narratives.
Stories with a small recurring cast and clearly defined locations can be particularly manageable for early projects.
Should You Write the Entire Story First?
Not necessarily.
You need enough structure to understand the narrative, but the project can evolve.
A practical starting point might be:
- one-paragraph concept;
- beginning;
- middle;
- ending;
- main characters;
- 6–10 major scenes.
You can then expand details as the visual story develops.
This keeps the project flexible without generating random scenes with no clear destination.
Frequently Asked Questions
Can I turn a written story into a video with AI?
Yes. A practical workflow is to break the written story into visual scenes, establish recurring characters, generate or design scene images, animate selected scenes and then assemble the sequence with narration, captions and music when appropriate.
What is the best way to convert a story to AI video?
Avoid attempting to generate the entire narrative as one prompt. Create a scene plan first, approve the visual identity of recurring characters and generate shots individually so continuity and pacing can be reviewed.
Can AI automatically turn a book into a video?
AI can assist with adaptation, but a long book contains much more information than a practical video can show directly. The story normally needs to be condensed into important scenes, characters and narrative beats before visual generation.
Should I create images before generating the video?
For recurring characters and continuity-sensitive stories, creating and approving scene visuals before animation can provide more control and make problems easier to correct.
Can I use image-to-video for story scenes?
Yes. Image-to-video is particularly useful when you already have an approved visual composition and want the resulting video to begin from that established scene.
Can I add narration to an AI story video?
Narration can be useful for context, exposition, time jumps and internal information that would otherwise require additional visual scenes.
How many scenes should my video story contain?
There is no fixed number. Use enough scenes to make the narrative understandable without illustrating every sentence. A short story can often be communicated with a relatively small number of strong visual moments.
Turn Your Story into a Video
The most important part of story-to-video creation happens before the first video generation.
Understand the narrative.
Choose the important moments.
Establish the characters.
Create the scenes.
Approve the visual continuity.
Then introduce motion, narration and music where they make the story stronger.
By treating the project as a sequence instead of asking AI to invent an entire film in one prompt, you gain much more control over the final result.
Create a Story with Novirec and start transforming your narrative into connected visual scenes.
If you’re new to the platform, create your Novirec account and begin your first story-to-video project.
Ready to put this workflow into practice?
Open Novirec Studio and start creating with the same tools covered in this guide.