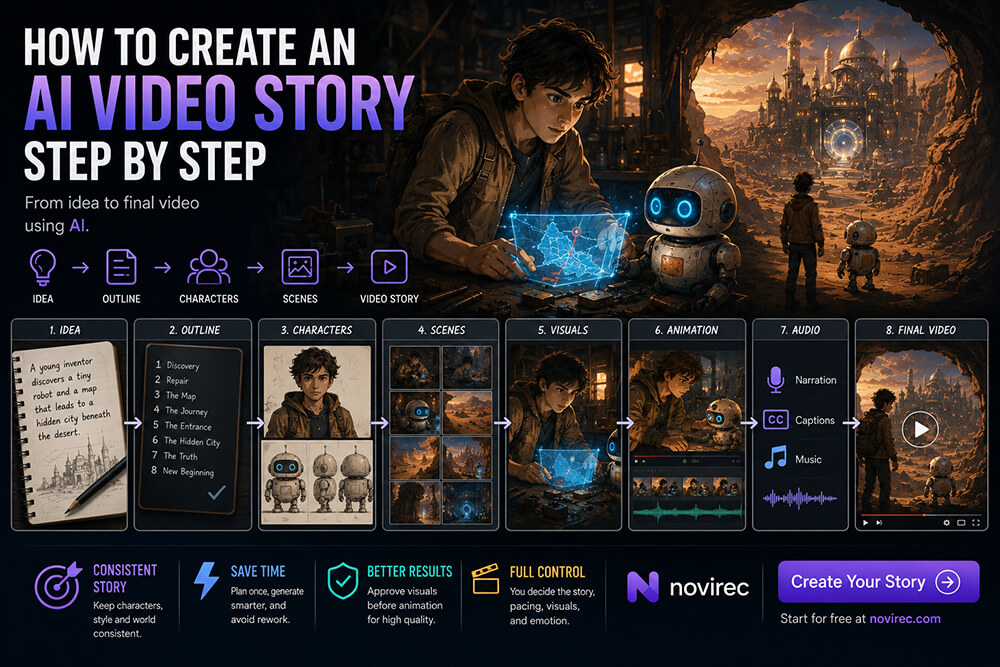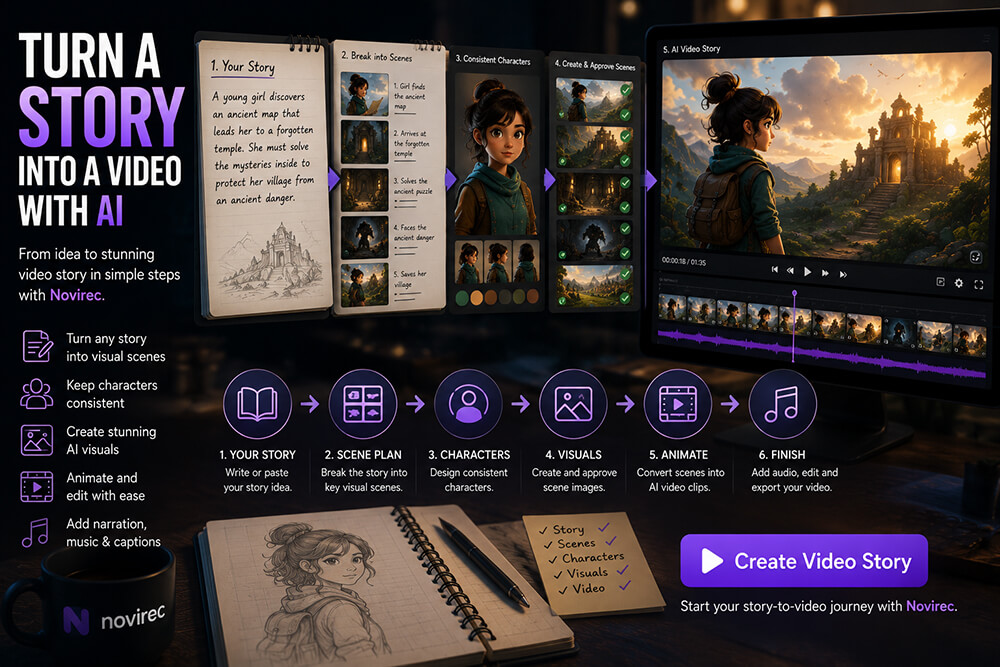

You have already created the scene.
The character looks right. The clothing is correct. The location matches the story. The composition works.
Now you want it to move.
This is exactly where image-to-video for story scenes becomes valuable.
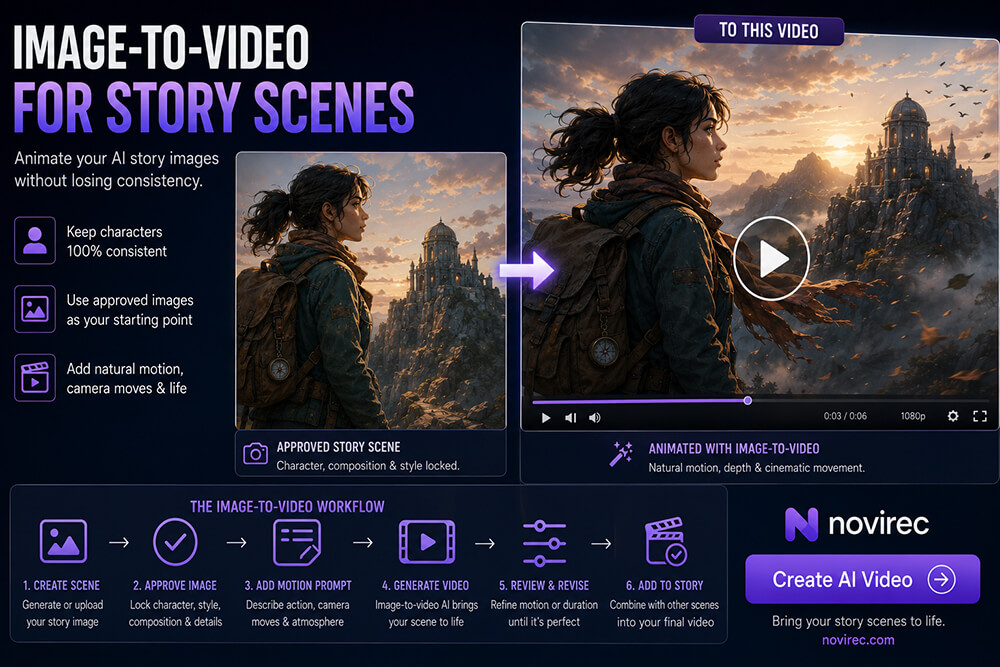
Instead of asking an AI video model to invent the character, location, composition and motion at the same time, image-to-video begins with an approved visual frame and focuses the next generation primarily on movement.
For visual storytelling, that distinction can make the workflow much easier to control.
Novirec currently supports both text-to-video and image-to-video workflows, including motion prompts, duration, resolution, audio and camera controls. (Novirec)
Create an AI video with Novirec when you’re ready to animate an approved story scene.
What Is Image-to-Video AI?
Image-to-video AI takes a still image as the visual starting point and generates a short moving video from it.
You might start with:
A young explorer standing at the entrance of an ancient temple.
The still image already determines much of the visual information:
- the explorer’s appearance;
- clothing;
- temple design;
- camera angle;
- lighting;
- color palette;
- composition.
You can then describe what should happen:
The explorer slowly raises her lantern while dust moves through the doorway. Her coat shifts gently in the wind. The camera makes a subtle push forward.
The video model’s task becomes more focused.
Instead of inventing the entire shot, it has to animate an established one.
Image-to-Video vs Text-to-Video for Storytelling
Both methods are useful.
They simply solve different problems.
| Text-to-Video | Image-to-Video |
|---|---|
| Starts primarily from text | Starts from an existing image |
| More visual freedom | More visual control |
| Good for exploration | Good for approved scenes |
| Model invents composition | Composition already exists |
| Character can be reinterpreted | Initial character appearance is established |
| Useful for atmospheric shots | Useful for continuity-sensitive shots |
| Faster for ideation | Stronger for structured story workflows |
If you need:
“A mysterious spaceship crossing a purple nebula”
and nothing about the exact ship design matters yet, text-to-video may be perfectly appropriate.
If you already spent time establishing:
the exact protagonist, wardrobe, location and framing,
image-to-video can avoid asking the model to solve those problems again.
Why Image-to-Video Is Particularly Useful for AI Stories
Standalone AI videos can tolerate variation.
Story videos cannot tolerate nearly as much.
Imagine this sequence:
Scene 1: Maya enters the forest.
Scene 2: Maya discovers a ruined tower.
Scene 3: Maya climbs the tower.
Scene 4: Maya sees the city beyond the mountains.
If every scene is generated independently from text, the model has repeated opportunities to reinterpret:
- Maya’s face;
- hairstyle;
- outfit;
- backpack;
- age;
- body proportions;
- art style.
But if each scene begins with an approved story image, much of that visual identity is already present before animation starts.
A useful workflow becomes:
Character → Story Scene → Approve → Animate
rather than:
Text Prompt → Generate Video → Hope Everything Matches
Step 1 — Create the Story Scene Before the Video
Suppose our story follows Maya, a young explorer searching for an abandoned mountain observatory.
Her character design is already established:
Hair: short wavy black hair
Jacket: dark teal
Backpack: tan canvas
Accessory: silver compass necklace
Style: cinematic stylized illustration
Now we need this scene:
Maya reaches the observatory shortly before sunset.
Before animation, create the still scene.
The image should answer:
- Is Maya correct?
- Is the observatory correct?
- Is the framing useful?
- Is there room for movement?
- Does the lighting match the story?
- Are important objects visible?
If any answer is no, fix it before video generation.
Step 2 — Choose a Source Image That Can Actually Be Animated
A beautiful picture is not automatically a good image-to-video source.
The image should contain a plausible opportunity for motion.
For example:
Good candidate
Maya standing outside the observatory with:
- visible coat;
- loose hair;
- clouds;
- grass;
- open environment.
Possible motion:
- hair moves;
- coat reacts to wind;
- clouds drift;
- grass moves;
- camera approaches.
Harder candidate
Extreme close-up where:
- most of the body is outside frame;
- hands are partially cut off;
- several objects overlap;
- composition is already visually crowded.
There may simply be fewer natural ways to animate it.
When generating the still image, already think:
What could move here later?
Step 3 — Decide What the Shot Is Supposed to Communicate
Do not begin with:
“Make this image move.”
Begin with the story purpose.
For example:
Establishing shot
Purpose:
Show how isolated the observatory is.
Motion could be:
Slow camera push toward the distant observatory while clouds and mountain mist drift subtly.
Character reaction
Purpose:
Show Maya realizing the observatory is occupied.
Motion:
Maya slowly stops walking, raises her head and looks toward a glowing upper window.
Discovery
Purpose:
Reveal the telescope.
Motion:
Maya pulls the dusty cloth away as the camera moves slightly closer.
The story determines the movement.
Not the other way around.
Step 4 — Write Motion Prompts Instead of Rewriting the Entire Image
This is one of the most useful habits for image-to-video.
The image already contains:
- character;
- environment;
- clothing;
- lighting;
- composition.
Your motion prompt can therefore focus on what should change over time.
Weak
Beautiful cinematic young woman with black hair wearing a teal jacket standing outside a detailed abandoned observatory in the mountains at sunset, cinematic, beautiful, highly detailed.
That mostly redescribes the image.
Better
Maya slowly walks toward the observatory entrance. Her jacket and hair move gently in the mountain wind. Thin clouds drift behind the building. Slow controlled camera push forward.
The second prompt tells the model what the video needs.
A Simple Motion Prompt Formula
For story scenes, use:
Subject movement + environmental movement + camera movement
For example:
Maya carefully raises the lantern and steps through the doorway. Dust particles drift through the beam of light. Slow camera follow from behind.
Or:
The robot turns its head toward Noah and its blue eyes flicker on. Small sparks fall from its damaged shoulder. Static camera with subtle cinematic depth.
Or:
The dragon slowly lifts its head while smoke escapes from its nostrils. Loose ash drifts across the ground. Camera gradually pulls backward.
You do not always need all three layers.
Simple movement is often better.
Step 5 — Keep Motion Controlled When Character Consistency Matters
Generative video can distort a character as movement becomes more complex.
A subtle shot might require:
- blinking;
- breathing;
- hair movement;
- small head turn;
- slow walking;
- camera push.
A complex shot might require:
- character spins around;
- begins running;
- removes a jacket;
- jumps;
- picks up another character;
- camera circles 180 degrees.
The second introduces far more opportunities for visual drift.
If continuity matters, break complex actions into separate shots.
Instead of:
Maya opens the door, runs inside, grabs a book, turns around and escapes.
Use:
Shot 1: Maya opens the door.
Shot 2: Maya enters.
Shot 3: Close-up of the book.
Shot 4: Maya grabs it.
Shot 5: She hears a sound and turns.
This is also better filmmaking.
Step 6 — Animate the Character Without Changing Their Identity
When reviewing an image-to-video result, watch the character carefully.
Check:
Face
Does the face remain recognizable during the shot?
Hair
Does the hairstyle remain structurally similar?
Clothing
Do colors and garment shapes survive?
Accessories
Does an important necklace, hat or backpack disappear?
Body
Do proportions change dramatically?
Style
Does the clip remain inside the same visual language?
A video can begin perfectly and drift halfway through.
Watch the entire clip, not only the first frame.
Step 7 — Preserve Story-State Continuity
Imagine Maya was injured in the previous scene.
Her sleeve is torn.
The next still image correctly includes the damaged sleeve.
Image-to-video should preserve it.
This is why approving the source image is useful.
Story-state information is already embedded visually.
That can include:
- dirty clothing;
- injuries;
- carried objects;
- weather;
- damaged props;
- missing accessories;
- nighttime lighting.
Before animation, ask:
Does this image correctly represent everything that has happened so far?
If not, correct the image first.
Step 8 — Animate the Environment Too
A believable video does not always require large character movement.
Environmental motion can bring a still illustration to life.
Examples:
Forest
- leaves moving;
- sunlight flickering;
- fog drifting.
City
- distant traffic;
- signs flickering;
- pedestrians moving subtly.
Snow
- falling snow;
- clothing reacting to wind;
- distant mist.
Workshop
- dust particles;
- hanging cables swaying;
- lights flickering.
Fantasy environment
- floating particles;
- magical light;
- water movement;
- clouds;
- smoke.
This can create cinematic motion while keeping the central character relatively stable.
Step 9 — Use Camera Movement with Purpose
Camera motion can transform an otherwise simple scene.
But more movement is not automatically more cinematic.
Slow push in
Useful for:
- discoveries;
- emotional moments;
- suspense.
Pull back
Useful for:
- revealing scale;
- isolation;
- ending a scene.
Pan
Useful for:
- revealing a location;
- following movement.
Tracking
Useful for:
- walking;
- running;
- vehicle movement.
Static camera
Useful for:
- dialogue;
- intimate scenes;
- controlled character performance.
A static shot can be more effective than a dramatic camera orbit.
Choose the movement that supports the scene.
Step 10 — Use Shot Duration According to Narrative Purpose
Do not automatically choose the maximum duration available.
A simple reaction might need only a few seconds.
A large environmental reveal may need longer.
Think about how long the viewer needs to:
- understand the image;
- recognize the action;
- experience the emotional beat.
Then move on.
If the information is communicated after three seconds, stretching the shot to ten seconds may slow the story down.
When Image-to-Video Works Especially Well
Image-to-video is particularly useful for:
Character-heavy scenes
Because the approved character already exists in the source image.
Establishing shots
Because location composition is already controlled.
Emotional scenes
Subtle movement can preserve an approved facial design.
Product or prop continuity
Important visual objects begin in the correct form.
Comic or illustrated-story adaptation
Existing approved illustrations can become animation foundations.
Recurring locations
The source image helps retain visual identity.
Cinematic reveals
You can precisely establish what will be revealed before adding motion.
When Text-to-Video May Be Better
Image-to-video is not always necessary.
Text-to-video can be useful when:
- no recurring character appears;
- you’re exploring ideas;
- exact composition does not matter;
- the shot is primarily atmospheric;
- you don’t yet have an approved image;
- visual variation is acceptable.
Example:
Aerial view of a massive desert storm approaching an empty valley.
If this is simply a transitional shot and does not contain important recurring elements, text-to-video may be completely sufficient.
Use the right workflow for each shot rather than forcing the entire story through one generation method.
You Can Mix Text-to-Video and Image-to-Video in the Same Story
A story does not need to choose one forever.
For example:
Shot 1 — Character close-up
Image-to-video.
Shot 2 — Empty city establishing shot
Text-to-video.
Shot 3 — Character enters apartment
Image-to-video.
Shot 4 — Storm clouds above city
Text-to-video.
Shot 5 — Character discovers object
Image-to-video.
This hybrid workflow lets you spend more control where continuity matters and more creative freedom where it does not.
Animate an Illustrated Story
Suppose you already created an illustrated story containing twelve approved images.
You do not necessarily need to rebuild the project from scratch to create a video version.
Those images can become visual foundations.
For example:
Illustration 1
Girl standing beside a train.
Animation:
Steam rises, her scarf moves, train lights flicker.
Illustration 2
Girl inside compartment reading a letter.
Animation:
Train vibration, subtle page movement, camera pushes toward the letter.
Illustration 3
Girl sees mysterious castle through window.
Animation:
Landscape moves outside, reflection shifts on glass, girl slowly raises her head.
The artwork becomes a storyboard that is already partially solved.
Animate Comic Panels
Comic panels can also inspire individual animated shots.
However, some panels are designed for static readability rather than movement.
A panel containing:
- character;
- dialogue bubble;
- dramatic composition;
may need to be adapted before video generation.
You might export or recreate the underlying visual without text, animate it, and handle captions/dialogue separately during video editing.
The principle remains:
use the comic’s approved visual identity as a foundation rather than reinventing the character.
Character Close-Ups Need Special Care
Close-ups are visually unforgiving.
Small facial changes become very noticeable.
Use restrained motion:
- blinking;
- breathing;
- slight head movement;
- subtle expression changes;
- slow camera movement.
Avoid forcing dramatic transformations unless necessary.
If the purpose of the scene is:
Maya realizes her friend has lied to her,
you probably do not need a 360-degree camera orbit.
A small shift in expression may communicate more.
Walking and Running Scenes Are Harder
Full-body movement is more complex than subtle portrait animation.
Walking introduces:
- legs;
- arms;
- clothing;
- perspective;
- changing background relationship.
Running increases complexity further.
If the result becomes unstable, consider simplifying the shot.
Instead of:
full-body side view of character running for eight seconds,
try:
- shorter duration;
- medium framing;
- tracking camera;
- separate shots;
- lower movement complexity.
Story editing can make a short controlled shot feel more energetic than one long unstable generation.
Avoid Asking for Transformations You Do Not Need
If your protagonist is already correct in the source image, avoid prompts such as:
Her clothes dramatically transform while the camera circles around her.
unless transformation is actually part of the narrative.
Every major change requires the model to invent new visual information.
Image-to-video is strongest when you leverage what is already established.
What If the Video Changes the Character?
First identify when the problem happens.
Drift starts immediately
The motion request may conflict with the source image or demand too much change.
Try simpler motion.
Drift appears halfway through
The duration may be too long for the action.
Try a shorter shot.
Face changes during head rotation
Reduce the angle or choose another reference composition.
Clothing changes
Simplify body movement or reinforce the important garment state.
Accessories disappear
Make sure they are clearly visible in the source frame and avoid unnecessary occlusion.
Do not automatically regenerate twenty times with the same prompt.
Change the variable that is causing instability.
Use Approved Scenes as Checkpoints
A useful story pipeline creates checkpoints.
For example:
Character approved
↓
Scene image approved
↓
Video shot approved
↓
Story sequence approved
If the video fails, you can return to the approved image.
You do not lose the underlying scene design.
This is much easier to manage than a workflow where every video generation starts from scratch.
First Frame vs Final Frame
The source image gives you strong control over the opening state.
But the ending still matters.
Ask:
Where does this clip finish?
Suppose scene A ends with Maya approaching a door.
Scene B begins with Maya already inside.
That transition can work.
But if scene A ends with Maya suddenly facing away from the door due to generation drift, the edit becomes awkward.
When reviewing the clip, inspect both:
starting continuity
and
ending continuity.
Plan Transitions Between Story Scenes
Image-to-video does not automatically solve editing.
Think about how one shot leads into another.
Action transition
Shot A:
Character reaches for the door.
Shot B:
Door opens from inside.
Visual transition
Shot A:
Camera pushes toward glowing object.
Shot B:
Close-up of the object.
Location transition
Shot A:
Car leaves city.
Shot B:
Wide desert road.
Time transition
Shot A:
Sun sets.
Shot B:
Nighttime camp.
Good transitions make separate AI-generated clips feel like a continuous story.
Use Narration to Reduce Unnecessary Animation
You do not need to animate every piece of information.
For example:
Maya traveled for three days before reaching the northern mountains.
You could generate several walking scenes.
Or show:
- one departure shot;
- one travel montage;
- one arrival shot;
while narration handles the time jump.
This saves generations and improves pacing.
Animation should be spent on moments worth seeing.
How Image-to-Video Can Reduce Wasted Generations
Video generation is usually more resource-intensive than establishing a still scene first.
A controlled workflow can therefore be economically useful too.
Instead of:
Video → wrong character → regenerate
Video → bad composition → regenerate
Video → wrong outfit → regenerate
you can do:
Image → correct character
Image → correct composition
Approve
Video → animate
That does not guarantee the first video generation will be perfect.
It does reduce the number of unresolved visual decisions entering the expensive stage.
Novirec’s public pricing documentation notes that generation credits vary according to factors including provider, model, duration, resolution, references and queue mode, with a route-aware quote shown before generation. (Novirec)
A Practical Image-to-Video Story Workflow
For each important scene:
1. Define the narrative beat
What changes?
2. Create the still scene
Get the visual composition right.
3. Check the character
Identity, clothing, accessories.
4. Check the world
Location, props, lighting and story state.
5. Approve the image
Do not animate a scene you already know is wrong.
6. Define the motion
Subject + environment + camera.
7. Generate the video
Choose appropriate settings.
8. Review the complete clip
Not just the opening frame.
9. Correct problems
Reduce complexity where needed.
10. Approve and assemble
Move to the next story shot.
This sequence turns image-to-video into part of a controlled production workflow rather than an isolated generation trick.
Image-to-Video Checklist for Story Scenes
Before generating:
- Is the source image approved?
- Is the character recognizable?
- Is the correct wardrobe visible?
- Are important props present?
- Does the environment match the story?
- Is the composition suitable for motion?
- Do I know what the shot needs to communicate?
- Can the requested action be simplified?
- Is the camera movement necessary?
- Is the duration appropriate?
After generating:
- Does the character remain recognizable?
- Did the clothes remain stable?
- Did important accessories survive?
- Is movement physically understandable?
- Did the background remain coherent?
- Does the shot end in a usable state?
- Can it transition naturally into the next scene?
Common Image-to-Video Mistakes
Animating an incorrect source image
Fix the still first.
Asking for too much movement
Simplify the shot or divide it into multiple clips.
Rewriting the full visual description
Use the motion prompt to describe what changes.
Making every camera move dramatic
Match movement to narrative purpose.
Ignoring the final frames
The ending matters for editing.
Generating long clips by default
Use only the duration the story requires.
Treating every scene with the same workflow
Mix image-to-video and text-to-video where appropriate.
Ignoring story continuity
A good individual animation can still be wrong for the narrative.
Frequently Asked Questions
What is image-to-video for AI stories?
Image-to-video uses an existing story image as the starting visual frame for an AI-generated video. This can be useful when the character, location and composition have already been approved and you want to add motion without reinventing the whole shot.
Is image-to-video better than text-to-video for consistent characters?
It can provide more visual control because the initial character appearance is already established in the source image. However, generative drift can still occur during motion, especially with complex actions or longer clips.
Should I create all story images before animation?
You do not have to complete every image first, but approving scenes before animating them can make continuity problems easier to detect and correct.
What should I write in an image-to-video prompt?
Focus primarily on motion: what the subject does, what moves in the environment and how the camera behaves.
Can I animate AI illustrations?
Yes. An approved illustration can serve as the starting frame for an image-to-video generation, making this useful for turning selected illustrated-story scenes into moving shots.
Can I animate comic panels?
Yes, although panels containing speech bubbles and text may need to be prepared as clean visual scenes before animation. Dialogue and captions can then be handled separately.
How long should an image-to-video story scene be?
Use the shortest duration that clearly communicates the narrative beat. Some reactions may only require a few seconds, while environmental reveals or slower emotional moments may benefit from more time.
Turn Approved Story Images into Video
Image-to-video is most useful when you stop treating it as:
“make my picture move”
and start treating it as:
the animation stage of an already designed story scene.
Establish the character first.
Create the scene.
Approve the composition.
Check continuity.
Then decide what movement actually contributes to the story.
By solving visual identity before motion, you give the video generation a much clearer starting point and make it easier to build connected scenes instead of unrelated clips.
Create an AI Video with Novirec to animate an approved image with an image-to-video workflow.
Building a complete narrative first? Create a Story with Novirec and develop your characters and scenes before animation.
Want to understand Novirec’s broader video workflow? Explore AI Video Generation.
Ready to put this workflow into practice?
Open Novirec Studio and start creating with the same tools covered in this guide.