
You already have the script.
Now you need to turn it into something people will actually want to watch.
That sounds simple until you start asking practical questions:
Which sentences deserve their own scene?
What should appear on the whiteboard?
What should stay in the narration?
Which concepts need diagrams?
When should the hand start drawing?
How long should each scene stay visible?
A good script-to-whiteboard video AI workflow should help solve those questions instead of simply placing paragraphs onto animated slides.
The real transformation is:
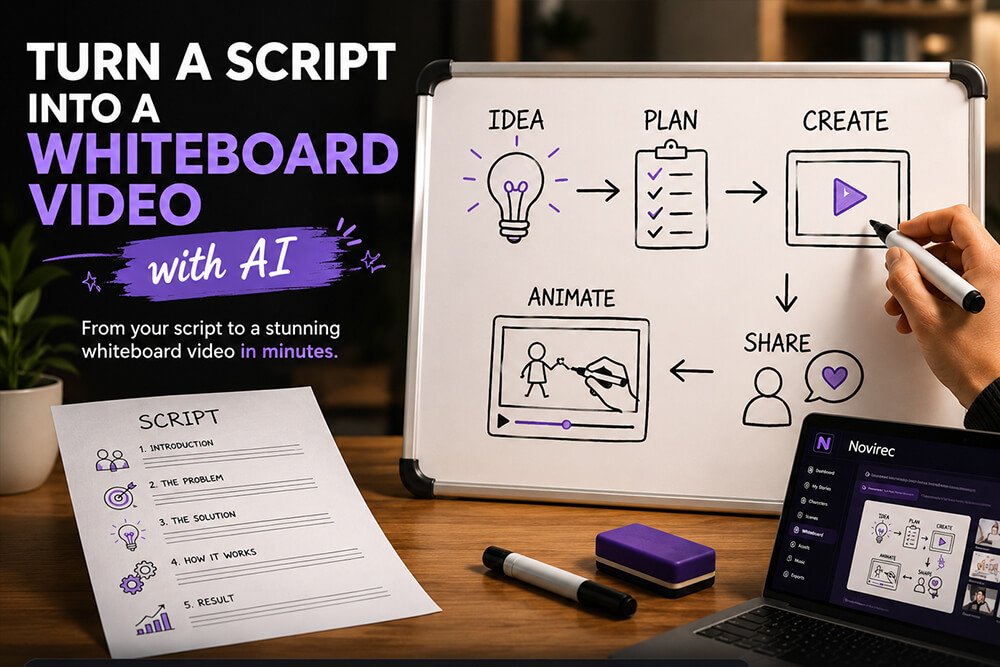
Script → Key ideas → Scenes → Visual explanation → Animation → Narration → Finished video
That is what separates a useful whiteboard explainer from a document being read aloud.
With Novirec, a script or initial idea can move through a structured Whiteboard workflow where the explanation is planned scene by scene, converted into visual boards, animated, narrated and ultimately exported as a complete video.
Open Novirec Studio to start creating your Whiteboard Video.
Why Turn a Script into a Whiteboard Video?
A script contains information.
A whiteboard video adds visual structure.
Consider this sentence:
“Customer acquisition becomes more expensive when companies rely entirely on paid advertising.”
As plain narration, the viewer simply hears the statement.
A whiteboard scene might show:
Paid Ads
↓
Higher Competition
↓
Higher Cost
↓
Lower Margin
Now the viewer can see the relationship.
That is the strength of whiteboard animation.
The goal is not to illustrate every word.
It is to identify which relationships, processes and ideas become easier to understand when they are shown visually.
What Kind of Scripts Work Well?
Whiteboard video works particularly well for scripts built around explanation.
Examples include:
| Script type | Why Whiteboard works |
|---|---|
| Educational lesson | Concepts can appear progressively |
| Product explainer | Problem → solution → result is easy to visualize |
| Training video | Processes can become clear sequences |
| Business presentation | Data and relationships become more visual |
| Tutorial | Steps can be revealed one at a time |
| Marketing explainer | Benefits and pain points become easier to follow |
| YouTube educational video | Narration and visual teaching work together |
| Internal communication | Complex ideas can be simplified |
A cinematic screenplay may need generative video instead.
But a script explaining how something works is often an excellent candidate for Whiteboard.
Script to Whiteboard Is Not Script to Slides
This distinction is important.
A traditional slide workflow often looks like:
Paragraph
↓
Put paragraph on slide
↓
Read paragraph
That produces text-heavy presentations.
Whiteboard animation works differently.
You extract the meaning of the paragraph.
Then represent that meaning visually.
For example:
Script
“Most abandoned shopping carts happen after the customer has already decided that they want the product. Unexpected costs, complicated checkout forms and missing payment options can still prevent the purchase.”
Whiteboard
Headline:
Why customers abandon checkout
Visual:
Cart → Checkout → three obstacles
Labels:
Extra costs
Too many steps
Missing payment option
Narration
The full explanation remains spoken.
That is a much stronger transformation.
Step 1 — Start with the Complete Script
Do not begin by creating visuals sentence by sentence.
First read the whole script.
You need to understand:
What is the main message?
Who is the audience?
What should they understand at the end?
Which parts are essential?
Which sections are supporting detail?
A five-minute script may contain dozens of sentences but only six or eight major ideas.
Those major ideas usually become your first scene candidates.
Step 2 — Find the Natural Sections
Most good scripts already contain a hidden structure.
For example:
Introduction
Problem
Why the problem happens
Solution
How the solution works
Example
Benefits
Conclusion
That can become:
Scene 1 — Hook
Scene 2 — Problem
Scene 3 — Cause
Scene 4 — Solution
Scene 5 — Process
Scene 6 — Example
Scene 7 — Result
Scene 8 — Takeaway
You are not breaking the script according to paragraph length.
You are breaking it according to meaning.
Step 3 — Give Every Scene a Purpose
Before drawing anything, complete this sentence:
“After this scene, the viewer should understand ______.”
Example:
Scene 1
After this scene, the viewer should understand that customer acquisition costs are rising.
Scene 2
After this scene, the viewer should understand why relying on one traffic source is risky.
Scene 3
After this scene, the viewer should understand how organic acquisition changes the economics.
That single rule prevents many overloaded whiteboard scenes.
If one scene has three unrelated purposes, it probably needs to become three scenes.
Step 4 — Identify the Must-Cover Information
Not every sentence deserves equal visual weight.
Suppose your original script contains:
“A backup is a separate copy of your data that remains available if the original device fails, becomes damaged, is stolen or is affected by ransomware.”
The must-cover idea is:
A backup gives you another copy when the original is unavailable.
The supporting causes can remain in the narration.
That means the board could simply show:
Original
→
Backup Copy
with a warning symbol on the original.
The AI does not need to place every example on screen.
Step 5 — Decide What the Viewer Should See
Now ask:
What visual representation makes this idea easier to understand?
Different concepts need different visual structures.
Process
Use:
A → B → C
Comparison
Use:
Before / After
or:
Option A vs Option B
Cause and effect
Use:
Cause → Result
Hierarchy
Use:
a tree or stacked levels.
Growth
Use:
a chart.
Choice
Use:
two paths.
Timeline
Use:
a sequence.
Relationship
Use:
connected objects or arrows.
Your visual structure should follow the logic of the script.
Step 6 — Convert Long Sentences into Whiteboard Micro-Copy
A whiteboard is not a teleprompter.
Keep visible text short.
Novirec’s Whiteboard composition approach separates what the audience sees from what the narrator says.
For example:
Script
“Automation helps teams reduce repetitive manual work and gives employees more time for activities that require human judgment.”
Board
Headline:
Automate repetitive work
Key line:
More time for high-value tasks
Visual:
Robot/gear → repetitive tasks → human thinking
The screen becomes immediately readable.
A Useful Whiteboard Text Formula
A scene can often be reduced to:
Short headline
1–3 supporting terms
one useful visual relationship
For example:
Why backups matter
Device fails
→
Backup restores data
That may be all the board needs.
The narrator carries the detail.
Step 7 — Let AI Help Structure the Script
This is where AI can save substantial time.
A useful script planner should not merely say:
Scene 1
Scene 2
Scene 3
It should understand what each scene is supposed to accomplish.
In Novirec’s Smart Script workflow, the scene plan can carry information such as:
Scene title
Setting
Key point
Narration / spoken point
as well as internal guidance that helps keep the board and narration aligned.
The result is a better connection between:
what the script means
and:
what appears on screen.
Step 8 — Review the AI Scene Plan
Do not automatically accept every proposed scene.
Check:
Is the order logical?
The explanation should build naturally.
Is one scene overloaded?
Split it.
Are two scenes saying the same thing?
Combine them.
Is an important concept missing?
Add it.
Is the conclusion clear?
The viewer should know the takeaway.
AI gives you a draft structure.
You remain the editor.
Step 9 — Build the Whiteboard Scene
Once the plan is approved, each scene can become an actual board.
A typical scene may contain:
Headline
Short key lines
One or more visual elements
Arrows or shapes
Labels
For example:
Topic
How recommendation systems work.
Board
Your activity
↓
Clicks
Searches
Watch time
↓
Recommendation system
↓
More relevant content
This communicates the basic idea visually before the narrator adds nuance.
Step 10 — Do Not Put Production Instructions on the Board
The viewer should never see internal instructions such as:
“Explain the problem”
“Introduce the solution”
“Show a graph”
Those are planning instructions.
The board should contain audience-facing content.
Instead of:
Explain why retention matters
use:
Retention drives growth
Instead of:
Show customer journey
use the actual customer journey diagram.
This makes the final Whiteboard feel intentional rather than AI-generated from notes.
Step 11 — Choose the Right Animation for Each Element
Once the board is ready, decide how each element enters.
Not everything should use the same animation.
Write On
Best for:
- headlines;
- labels;
- short text.
Full Draw
Best for:
- arrows;
- simple icons;
- geometric diagrams;
- clean drawable SVGs.
Simulated Draw
Best for:
- characters;
- detailed illustrations;
- complex objects.
Hand Reveal
Best for:
- raster artwork;
- graphics that should appear progressively but cannot be truly drawn.
Slide In
Best for:
- examples;
- images;
- cards;
- supporting elements.
The effect should match the asset.
Step 12 — Use Reveal Order to Explain the Script
Suppose the narration says:
“Traffic arrives first. Some visitors become leads. A smaller percentage eventually become customers.”
A good reveal sequence is:
Traffic
↓
Visitors
↓
Leads
↓
Customers
The animation mirrors the logic of the sentence.
The viewer is never forced to decide which part of the diagram to inspect.
The video guides attention progressively.
Step 13 — Write Narration from the Script and Board Together
You already have a source script.
That does not mean you should simply paste each paragraph into the narrator field unchanged.
The board now communicates part of the information.
So narration can become shorter and more natural.
Original script
“Solar photovoltaic cells receive photons from sunlight, generating electrical current that is then converted through an inverter into electricity that household appliances can use.”
Board
Sun → Panel → Inverter → House
Narration
“Solar panels convert sunlight into electricity. An inverter then converts that power into a form your home can use.”
Same concept.
Much easier to hear.
Step 14 — Avoid Reading the Board Aloud
Board:
3 Causes of Customer Churn
Narrator:
“There are three common reasons customers leave: poor onboarding, weak product value and inadequate support.”
That works.
But avoid:
Board:
Poor onboarding
Weak product value
Inadequate support
Narrator:
“Poor onboarding. Weak product value. Inadequate support.”
That adds little.
The narrator should explain why those elements matter.
Step 15 — Keep Narration Consistent Between Scenes
A common problem with AI-generated narration is that every scene feels independently written.
Scene 1:
“First, let’s explore the issue.”
Scene 2:
“Now let’s dive into another important topic.”
Scene 3:
“Next, we’ll discover something interesting.”
The repetition becomes obvious.
A better narration workflow should consider:
- the complete script;
- previous scenes;
- previous accepted narration;
- what is already visible on the canvas.
That produces smoother transitions.
For example:
“That explains why the cost increases. The next question is what you can do about it.”
Then Scene 4 begins.
The project feels like one explanation rather than eight disconnected AI responses.
Step 16 — Generate the Voice After Editing the Narration
When the text sounds good:
Generate the voice.
Then preview it with the scene.
Do not judge only the audio.
Watch:
animation + board + voice
together.
Ask:
Does the drawing appear when the narrator mentions it?
Is the viewer given enough time to read?
Does the scene finish too early?
Does the voice feel rushed?
The relationship between these layers determines the quality of the video.
Step 17 — Let the Scene Duration Follow the Explanation
Do not force every scene to be five seconds.
Some ideas require more time.
For example:
Scene A
Simple title reveal.
May need only a few seconds.
Scene B
Four-part business process.
Needs considerably longer.
The effective scene duration should accommodate:
- animation;
- narration;
- a brief final hold;
- transition.
The script should determine pacing, not an arbitrary universal duration.
Step 18 — Use Silence When It Helps
A script-to-video workflow does not mean the narrator must speak continuously.
Imagine:
Narrator:
“And then the number doubled.”
The completed chart rises dramatically.
A one-second pause can make the result more impactful.
Then:
“That was the moment the team realized the experiment was working.”
Silence is part of pacing.
Step 19 — Add Subtitles Only If They Help
Subtitles are useful for:
- accessibility;
- silent viewing;
- social platforms;
- complex terminology.
But the whiteboard may already contain visible text.
Do not overload the frame.
A narrated educational video might use:
Board text
Voice
and no subtitles.
A social video may use:
Board text
Voice
subtitles
because many viewers watch silently.
Choose according to the use case.
Step 20 — Add Music and Transitions During Polish
Once the core explanation works, add finishing touches.
Do not use music to rescue an unclear script.
First solve:
structure
board
animation
narration
Then polish.
Music should remain behind the narrator.
Transitions should help separate or connect ideas.
Simple Cut, Fade or Crossfade transitions are often enough.
Step 21 — Preview the Complete Video
This is essential.
A scene can work perfectly alone but feel wrong inside the full sequence.
Watch the entire project without stopping.
Check:
| Question | What to look for |
|---|---|
| Does the opening create interest? | First seconds should establish relevance |
| Is the logic easy to follow? | Every scene should lead naturally to the next |
| Is the board readable? | No overcrowded scenes |
| Is the voice natural? | No robotic repetition or awkward transitions |
| Is timing comfortable? | Enough time to process each scene |
| Is motion useful? | Animation should guide attention |
| Is the conclusion clear? | Viewer knows the main takeaway |
Then fix the largest problem first.
Step 22 — Export the Finished Whiteboard Video
Once the scenes, narration and polish are approved, the project can become the final MP4.
Your original script has now been transformed from:
a linear block of text
into:
a timed visual explanation.
That final distinction matters.
The goal is not merely to “animate a script.”
It is to translate written information into a visual teaching sequence.
Example: Script to Whiteboard Video
Imagine this original script:
“Small businesses often assume cybersecurity attacks only target large companies. In reality, smaller organizations can be attractive targets because they frequently have fewer security resources. A simple protection strategy begins with strong passwords, software updates, employee awareness and reliable backups.”
We could convert it into four scenes.
Scene 1 — The misconception
Board
“We’re too small to be targeted.”
Small company icon.
Warning symbol appears.
Narration
“Many small businesses assume cybercriminals are only interested in large companies.”
Scene 2 — The reality
Board
Small company → target
Headline:
Small can still be vulnerable
Narration
“Smaller organizations can actually be attractive targets when security resources and processes are limited.”
Scene 3 — The protection layers
Board
Four icons:
Password
Update
Training
Backup
Narration
“Basic protection begins with a few strong habits: secure passwords, current software, employee awareness and reliable backups.”
Scene 4 — The takeaway
Board
Shield around business.
Reduce the risk before the attack
Narration
“No single measure eliminates every threat, but several simple layers can dramatically reduce your exposure.”
The source text is still recognizable.
But the viewer experiences a much clearer explanation.
How Much of the Script Should Appear on Screen?
Usually much less than you expect.
Imagine a 1,000-word script.
That does not mean the whiteboard should contain 1,000 words.
The visible board may contain only:
- headlines;
- keywords;
- labels;
- numbers;
- short conclusions.
The voice carries most of the original prose.
This is why script-to-whiteboard is a translation process, not a copy-and-paste process.
Should Every Paragraph Become a Scene?
No.
Paragraphs are writing units.
Scenes are communication units.
One paragraph might contain three ideas and need three scenes.
Three short paragraphs may explain the same concept and belong in one scene.
Use meaning instead of paragraph boundaries.
How Many Scenes Should a Whiteboard Video Have?
It depends on the script.
A simple 60-second explainer may have around:
5–8 scenes.
A longer educational video might use many more.
Rather than target a fixed number, use this rule:
Create a new scene when the viewer needs a new visual idea.
That often produces natural pacing.
How to Shorten a Long Script for Whiteboard
If the source script is too long, identify:
Core message
What absolutely must be understood?
Supporting examples
Which examples genuinely help?
Repetition
Does the script say the same thing in different ways?
Detail
Which information belongs in another video?
Whiteboard works best when the communication is focused.
A shorter, clearer video often performs better than an animation trying to preserve every sentence from the original document.
Can You Turn a Blog Article into a Whiteboard Video?
Yes.
But do not treat the complete article as a voice-over script.
A better transformation is:
Article
↓
Main argument
↓
Key sections
↓
Scene plan
↓
Visual explanation
↓
Narration
For example, a 2,500-word blog post might become a three-minute whiteboard explainer containing only the most useful concepts.
The article and video can then support each other.
Can You Turn a Training Document into a Whiteboard Video?
Yes.
This is one of the strongest use cases.
Suppose you have an internal document explaining:
How employees should handle suspicious emails.
Instead of requiring employees to read several pages, the content can become a sequence:
Recognize
↓
Do not interact
↓
Report
↓
Verify
↓
Resolve
The source document remains the information base.
The Whiteboard Video becomes the teaching format.
Can You Turn a Lesson into a Whiteboard Video?
Yes.
Educational material often translates especially well because concepts can appear progressively.
For example:
Photosynthesis
can become:
Sunlight
↓
Leaf
↓
Water + CO₂
↓
Glucose + Oxygen
The narration explains the process while the diagram develops.
This is much easier to follow than presenting the final diagram immediately.
Can AI Create the Scene Plan Automatically?
AI can create a strong first draft.
But you should review it.
A good AI plan can identify:
- major concepts;
- natural sections;
- key visual moments;
- suggested narration.
Human review is still useful for:
- accuracy;
- emphasis;
- teaching order;
- brand tone;
- audience level.
The best workflow combines AI speed with human editorial control.
What if My Script Is Already Narration-Ready?
That helps.
You can keep much of the spoken text.
But you still need to ask:
What part of this sentence should become visual?
For example:
Narration:
“Revenue increased, but acquisition cost increased even faster.”
Board:
Revenue ↗
Acquisition Cost ↗↗
You do not need to rewrite the entire voice-over.
You simply add a visual layer that makes it easier to understand.
What If My Script Is Too Technical?
Use the Whiteboard plan to simplify presentation without removing necessary accuracy.
Separate:
technical terminology
from:
visual logic.
A complex system may still have a simple visual relationship.
For example:
API request → Server → Database → Response
The narration can explain the technical detail.
The board helps the viewer maintain orientation.
Common Script-to-Whiteboard Mistakes
The most common mistakes are copying paragraphs directly onto the board, making one scene for every sentence, adding decorative visuals that do not explain anything, forcing every asset into the same Draw effect, allowing narration to repeat visible text, creating AI scenes without reviewing their logical order, and polishing music or transitions before the explanation itself works.
A good workflow continuously asks:
Does this make the script easier to understand?
If the answer is no, the visual probably does not belong in the scene.
Script-to-Whiteboard Checklist
Before export, verify:
- Every scene has one clear purpose.
- The important ideas from the script are covered.
- Visible text is concise.
- Visuals explain rather than decorate.
- Reveal order follows the logic of the narration.
- Narration sounds natural when spoken.
- The board and narration do not unnecessarily repeat each other.
- Scene timing gives viewers enough time to understand.
- Captions are enabled only when useful.
- Music never competes with the explanation.
- Transitions feel natural.
- The conclusion clearly communicates the takeaway.
Frequently Asked Questions
Can AI turn a script into a whiteboard video?
Yes. AI can help break the script into scenes, identify the key purpose of each section, create concise visual content and prepare narration. The resulting scenes should still be reviewed before animation and export.
Can I paste an existing script into an AI whiteboard generator?
Yes, but the best workflow does more than animate the text directly. The script should first be transformed into visual scenes with clear explanatory goals.
Should the whiteboard display the full script?
Usually no. The board should show concise headlines, keywords, diagrams and visual relationships while narration carries the detailed explanation.
Can I create a whiteboard video from a blog post?
Yes. Extract the main ideas first, convert those ideas into scenes and use the original article as source material for the narration.
Can I create a whiteboard video without recording my own voice?
Yes. AI text-to-speech can generate narration after the scene text has been reviewed.
Can I use complex illustrations in a script-based Whiteboard Video?
Yes. Simple drawable vectors can use path-based animation, while richer illustrations can use simulated drawing or progressive reveal effects.
Can the final whiteboard video include music and subtitles?
Yes. Narration can be combined with optional captions, background music and scene transitions before final video export.
Turn Your Script into a Visual Explanation
A script already gives you the information.
The challenge is deciding how the viewer should experience it.
A strong AI Whiteboard workflow converts:
paragraphs
into:
ideas
then:
ideas
into:
scenes
then:
scenes
into:
visual explanations.
From there, animation controls where the viewer looks.
Narration adds context.
Timing determines how quickly the ideas unfold.
Polish brings the scenes together.
And export turns the entire sequence into a finished video.
That is much more powerful than simply placing text onto animated slides.
Open Novirec Studio and start turning your script into a complete Whiteboard Video.
Need to prepare an image before adding it to your scene? Use Remove Background or Vectorize Image directly in Novirec.
New to the platform? Create your Novirec account.
Ready to put this workflow into practice?
Open Novirec Studio and start creating with the same tools covered in this guide.